
|
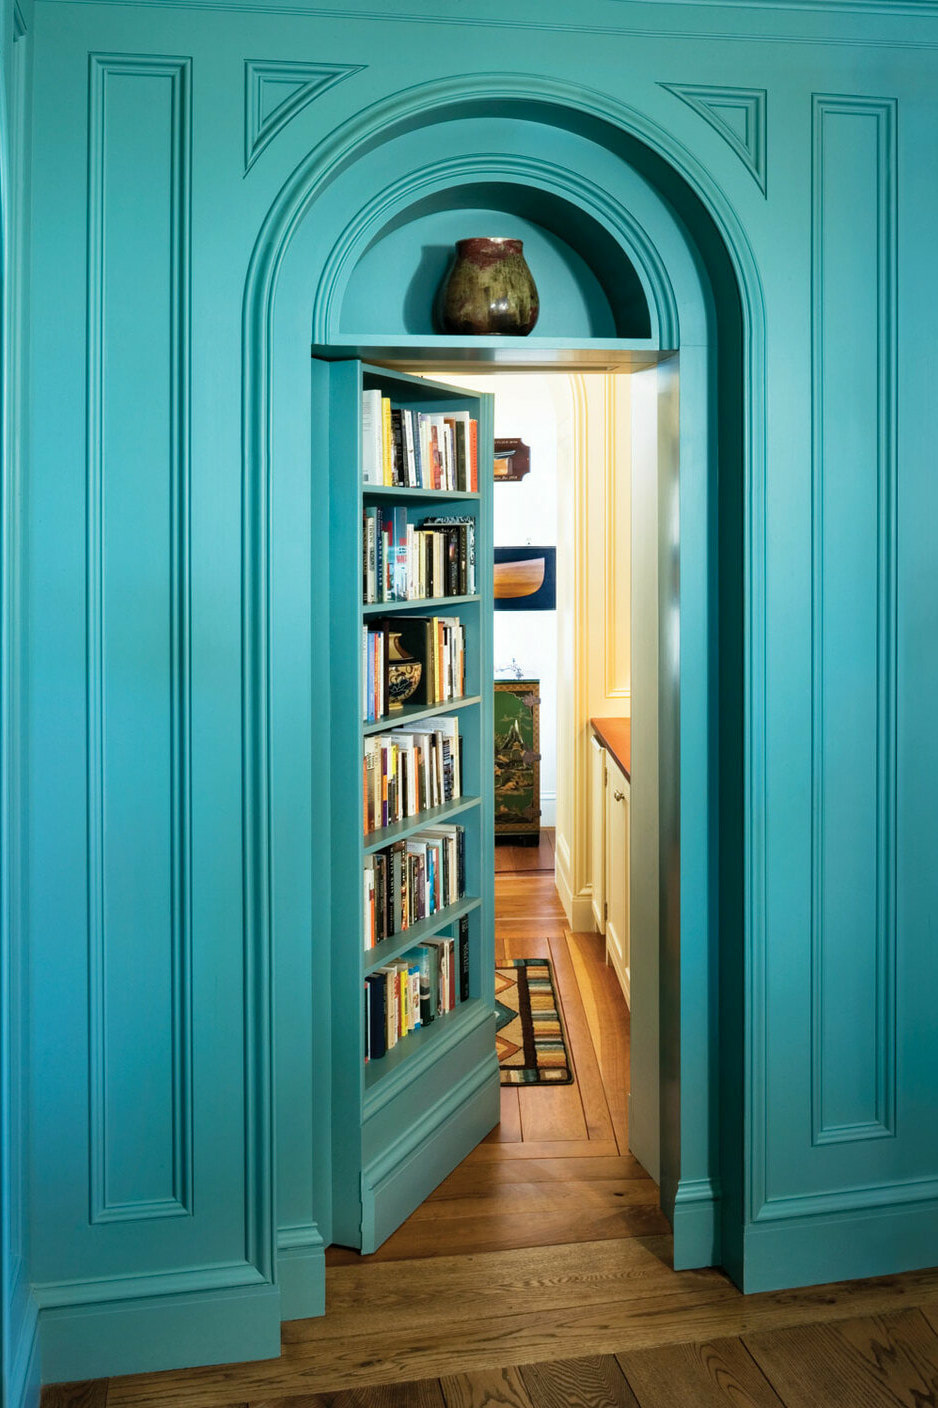
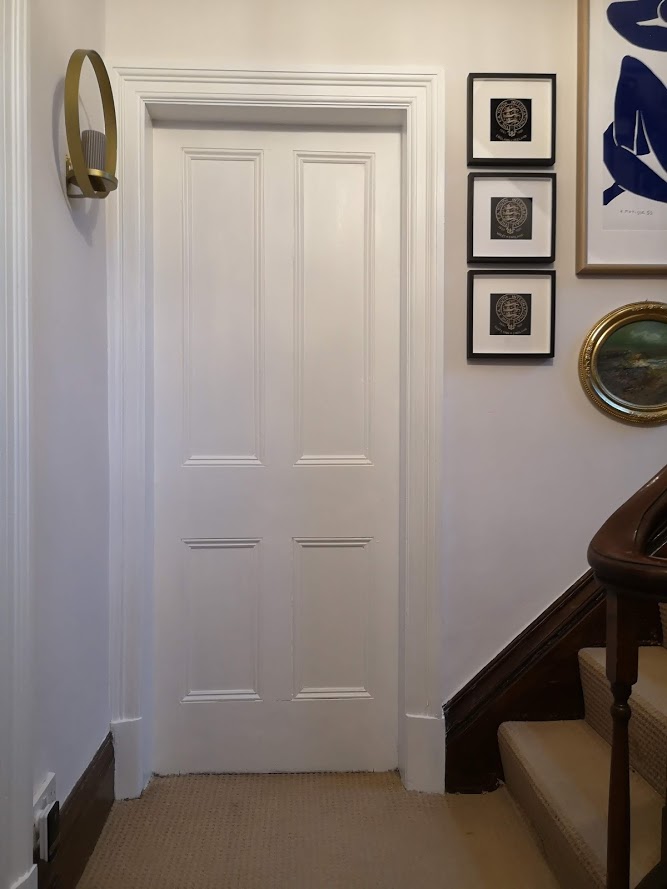
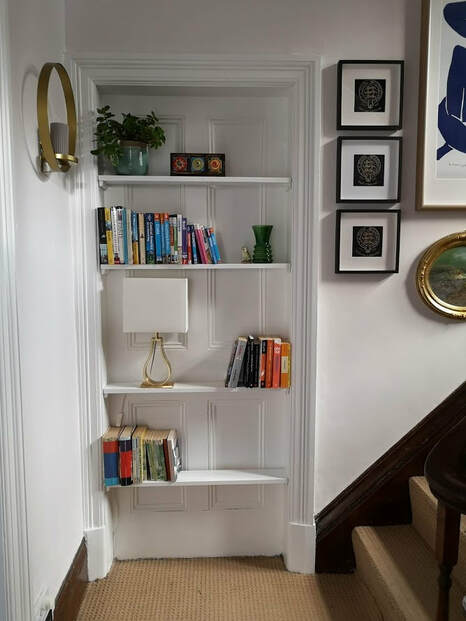
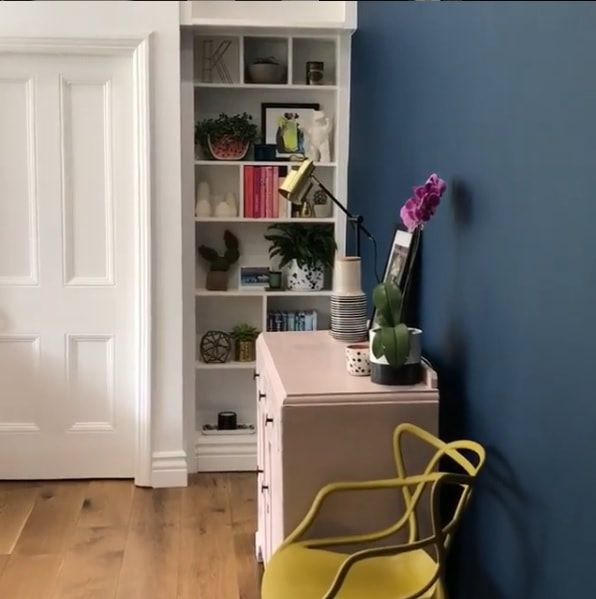
I have always been fascinated by older houses and their history. Every new owner changes something and these are passed onto the next people living in the space. Our house is not any different. The grand staircase going up the centre of the house has many doors leading off into various rooms, but one of these doors is a fake! The original house used to have a separate bathroom and water-closet (WC), but a few owners ago this layout was changed and the two rooms were knocked through to create a spacious en suite for one of the bedrooms, and the bathroom was moved into one of the bedrooms (Link to see this space). This left two redundant doors in the hallway, as the access to this room was though a new doorway directly into the bedroom. A while ago one of the owners decided to get rid of one of the door ways and leave the other (who knows why!), but this created the perfect opportunity for my project! I have always wanted to create a doorway bookshelf. I believe that storing books in a redundant doorway has a magical, naria-esque, romance to it. The mystery of where that door lead to, is mirrored in the mysteries held amongst the pages of those books held within it.
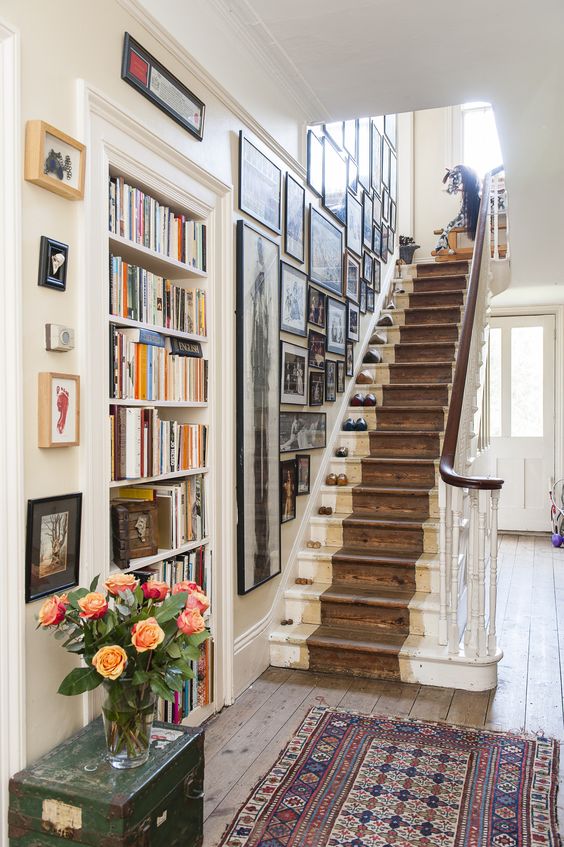
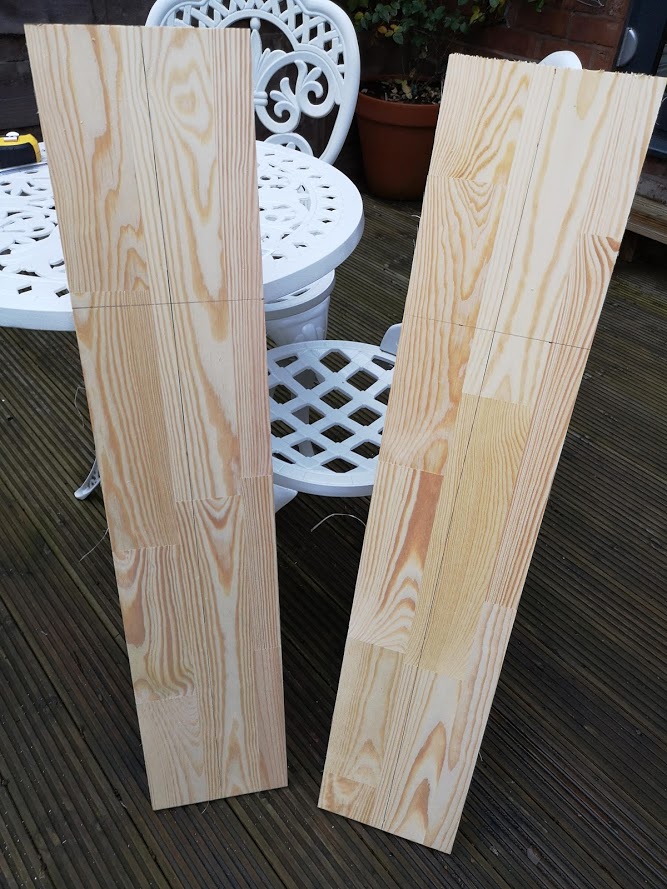
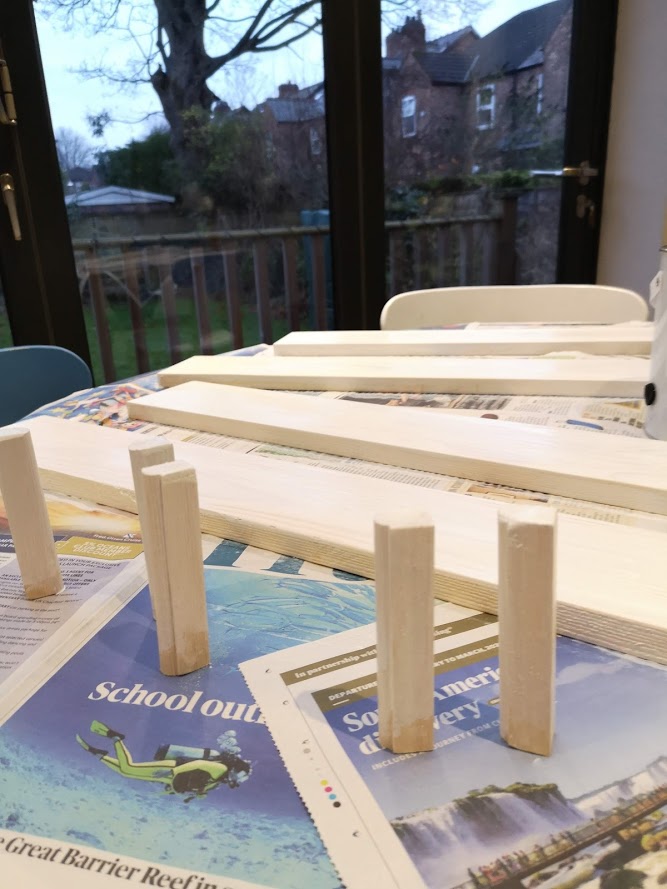
The above photos show some of the inspirational shots you can also see on my staircase board on Pinterest. With these I wanted to freshen up our space. Our door doesn't open or needed to be walked through like the blue one above (although these doors are super cool and some amazing IG folk have got these beauties - see below). So the process was relatively simple!
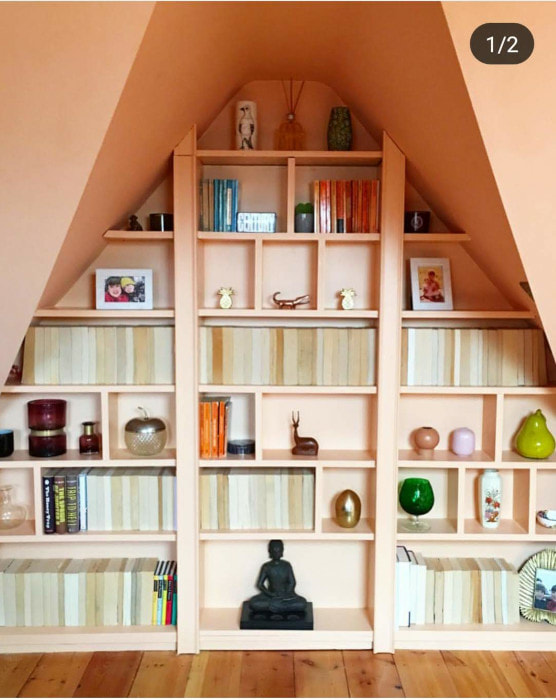
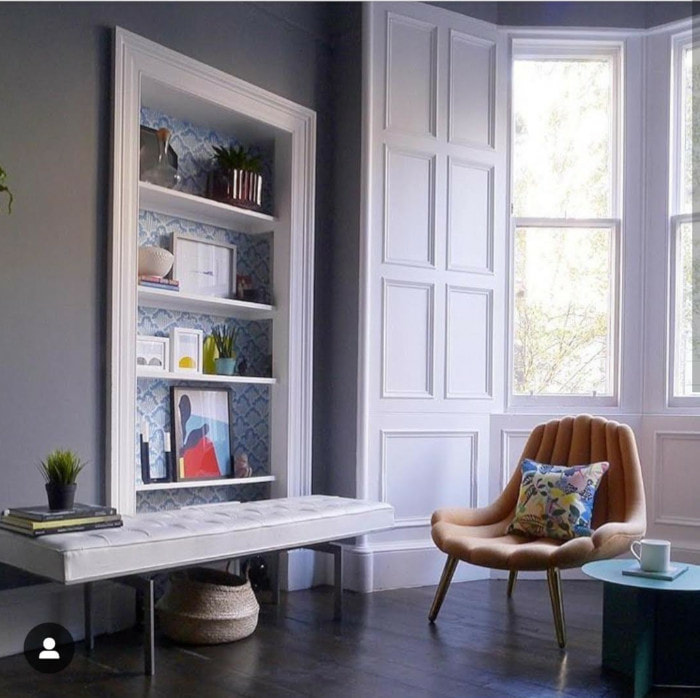
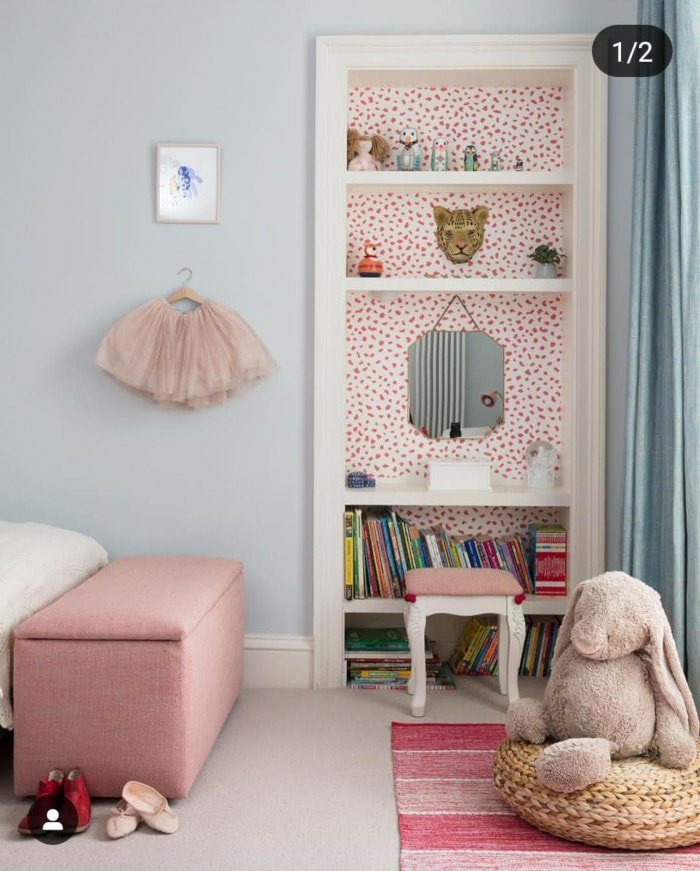
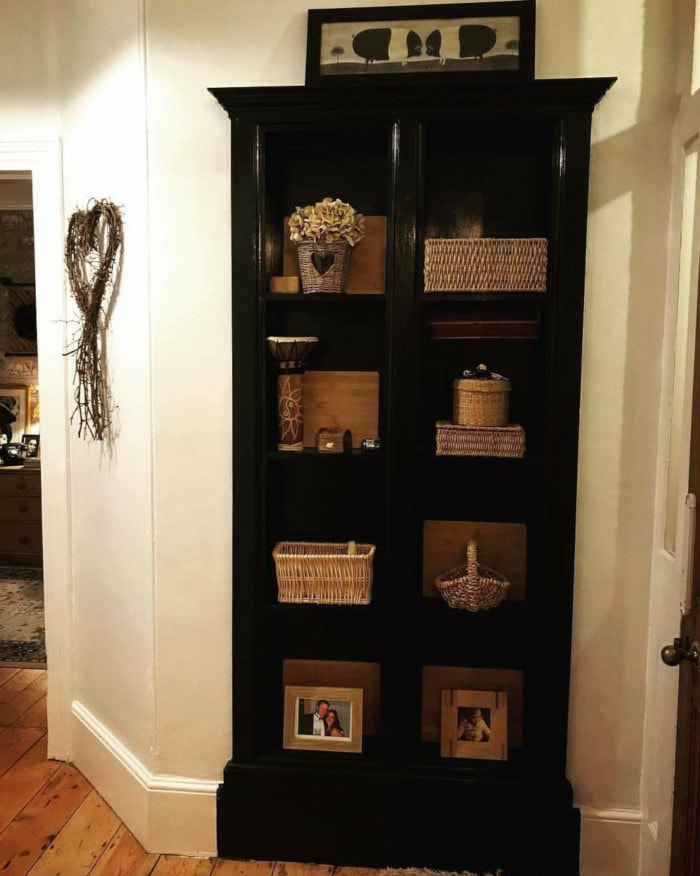
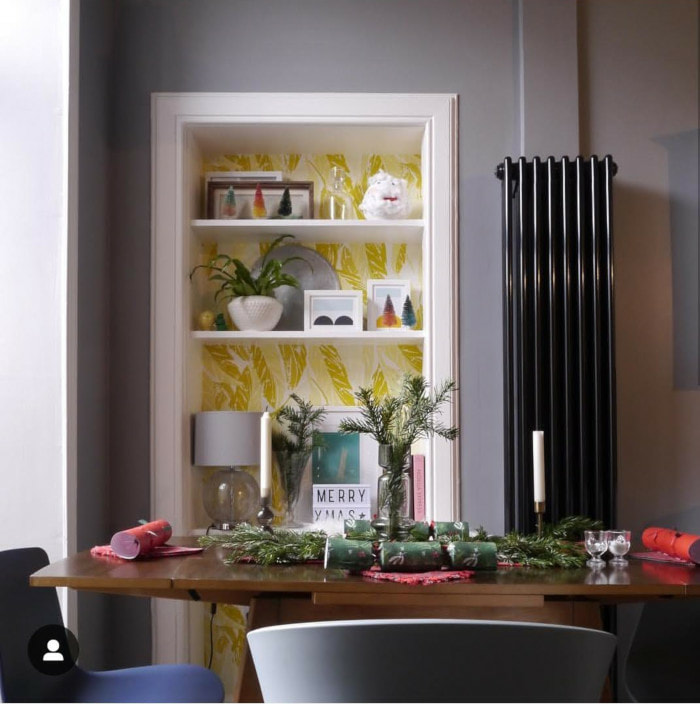
, Btw as mentioned above, here are some other beautiful doorway bookshelves from some real homes in the UK! If you know of any others please send them to me!
2 Comments
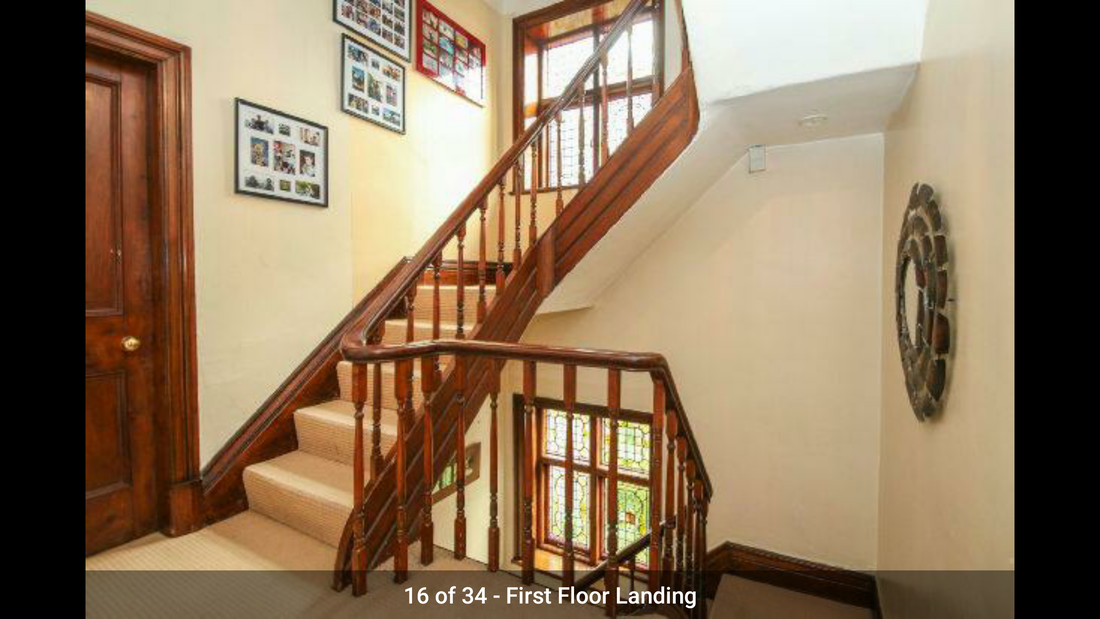
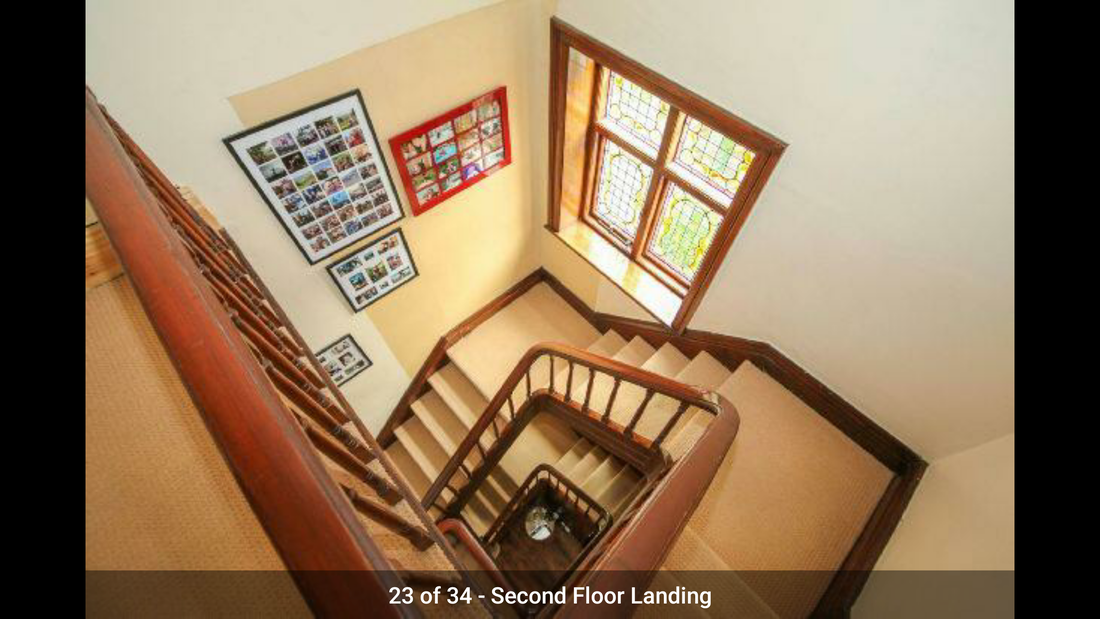
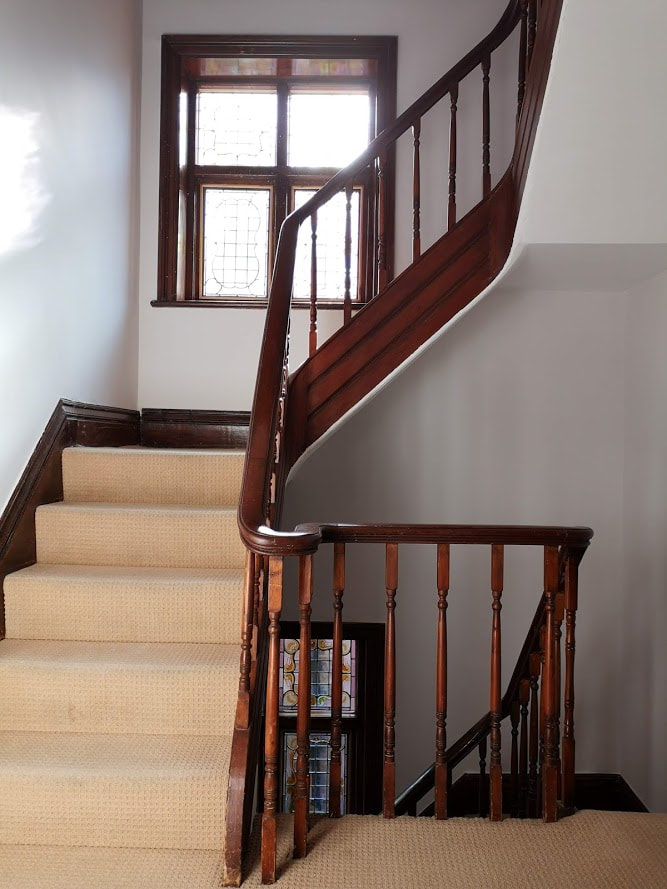
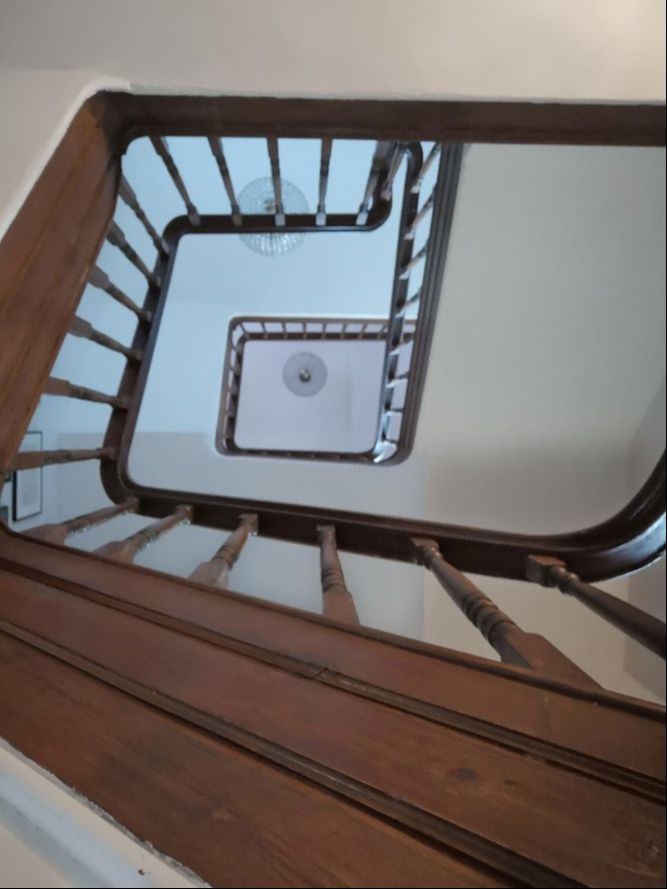
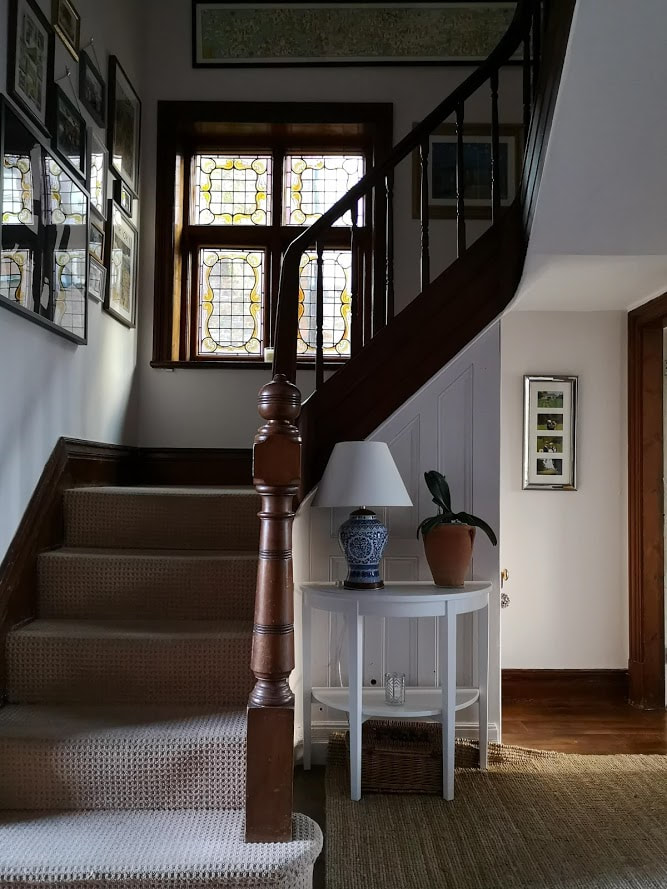
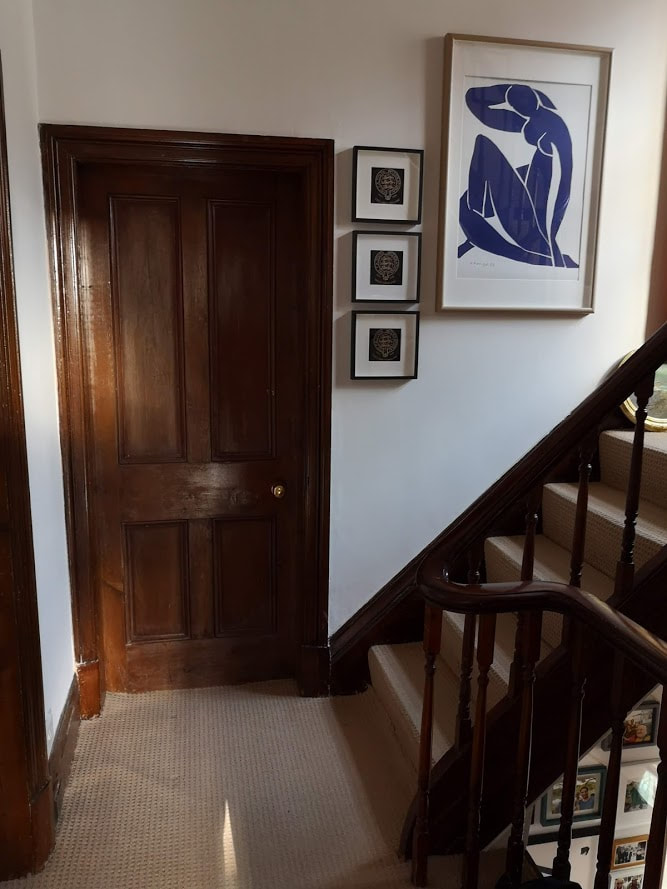
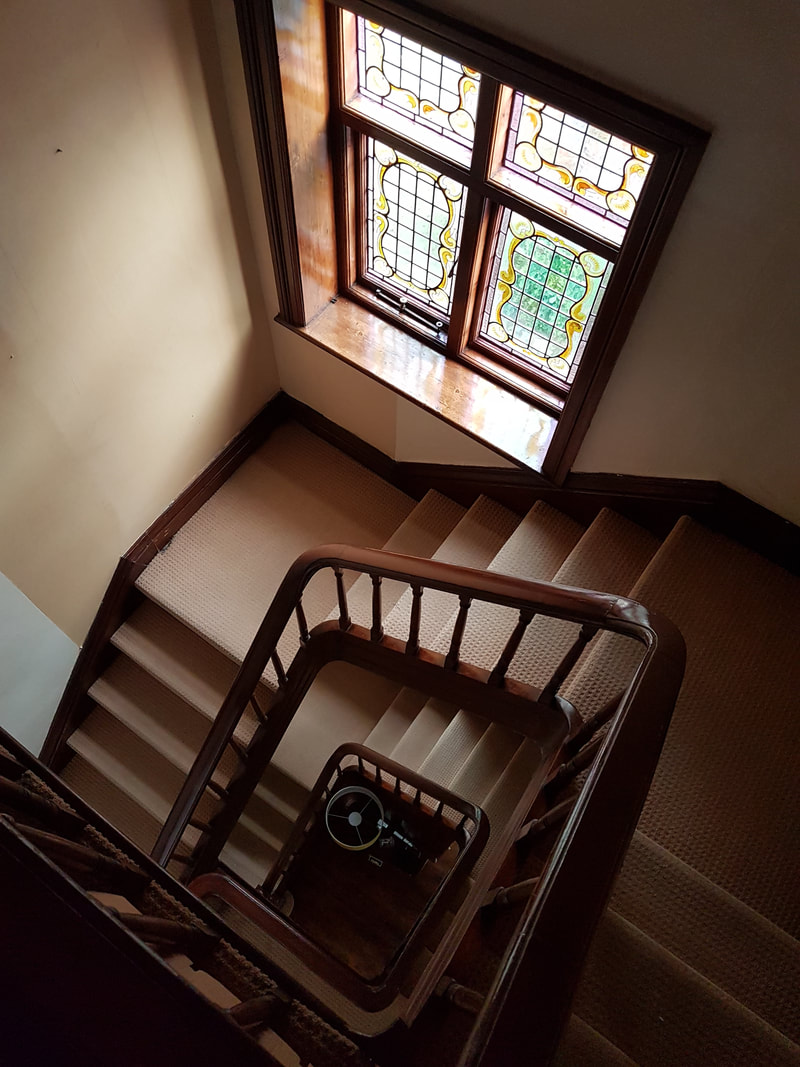
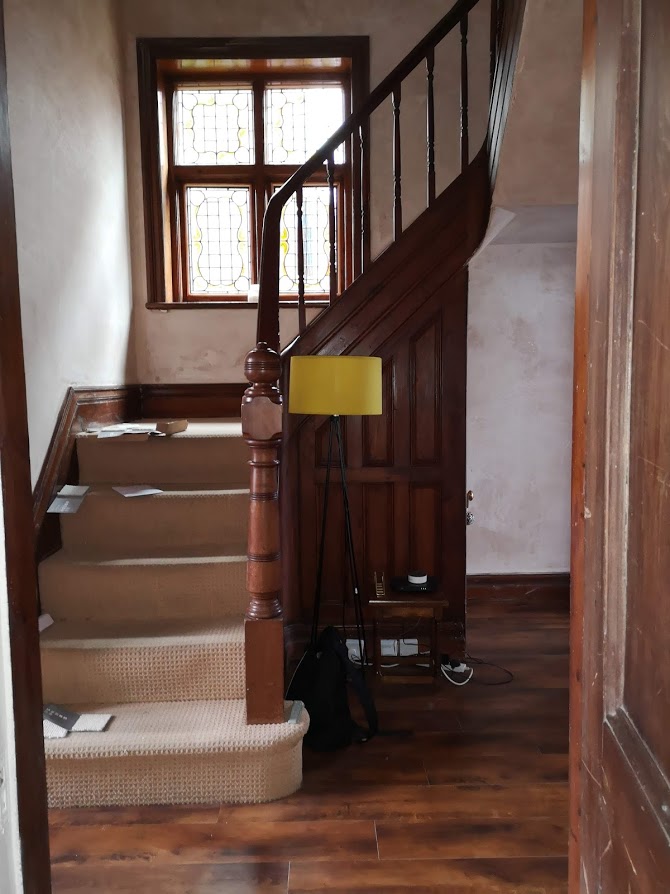
Good evening everyone! I just wanted to pop on here and speak to you lovely lot about how I created my gallery wall. In this house we are very lucky to have a Double- L shaped staircase. This creates drama and volume to the hallway and is such a lovely feature that made us fall in love with the house when we came to view it. Although it can be quite a tricky space to dress. Here are some before photos from the estate agents website.
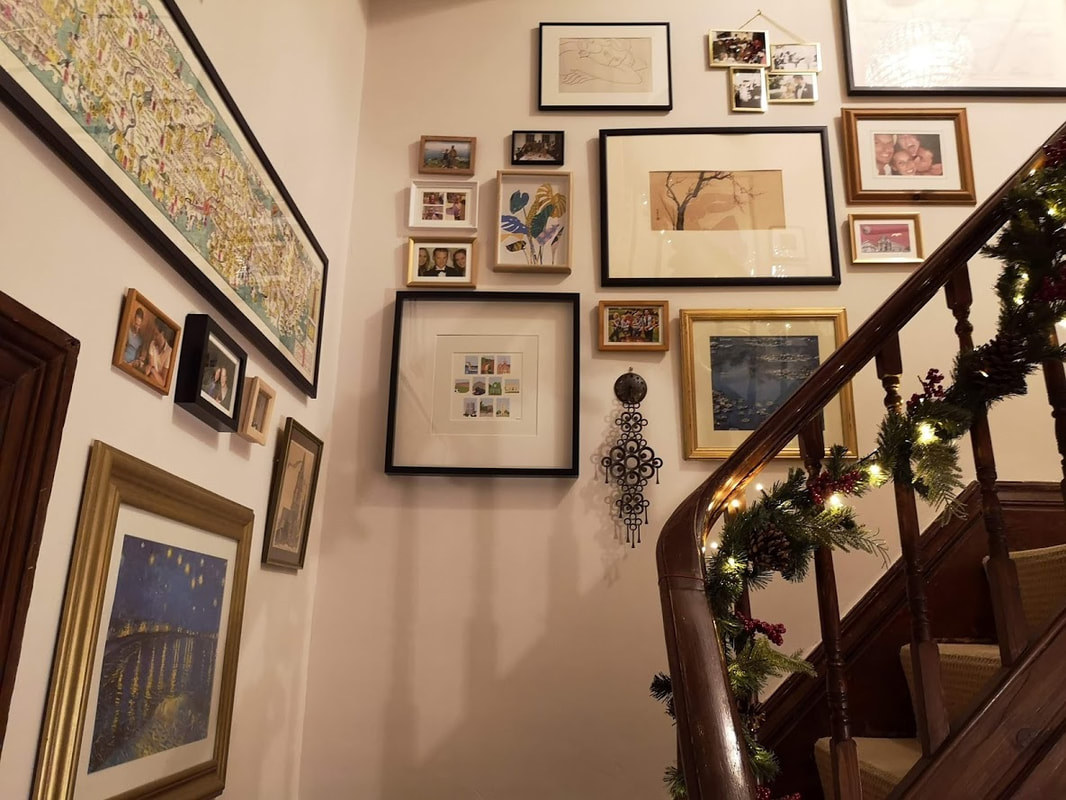
I wanted to create something showstopping and at the same time a place that would showcase our family and passions. I didnt want it to be too controlled and impersonal. I drew inspiration from many places, Pinterest was a firm favourite and I scoured the internet pinning all the photos that I loved and thought would work in the space. I also drew from a fellow blogger Lisa Dawson who created this fabulous gallery wall pictured below. 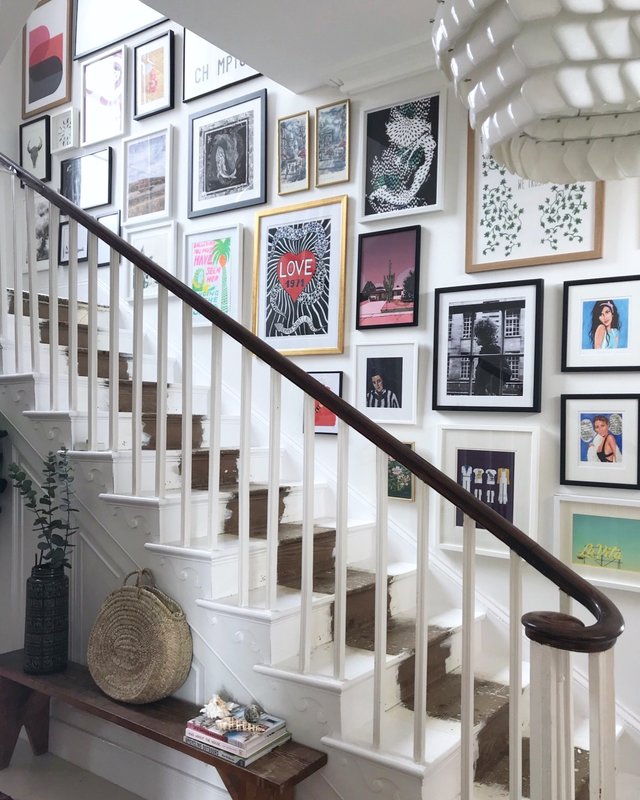
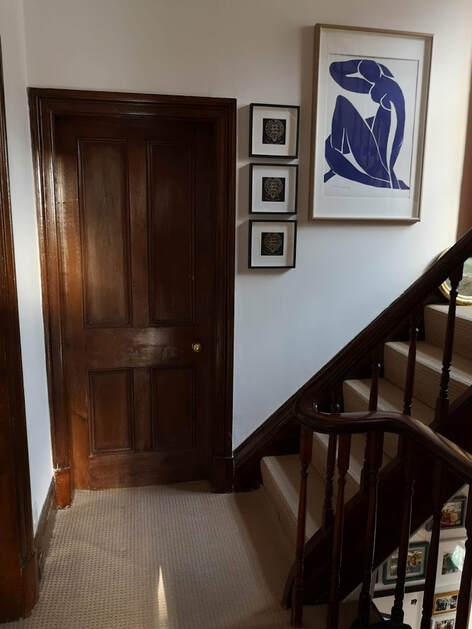
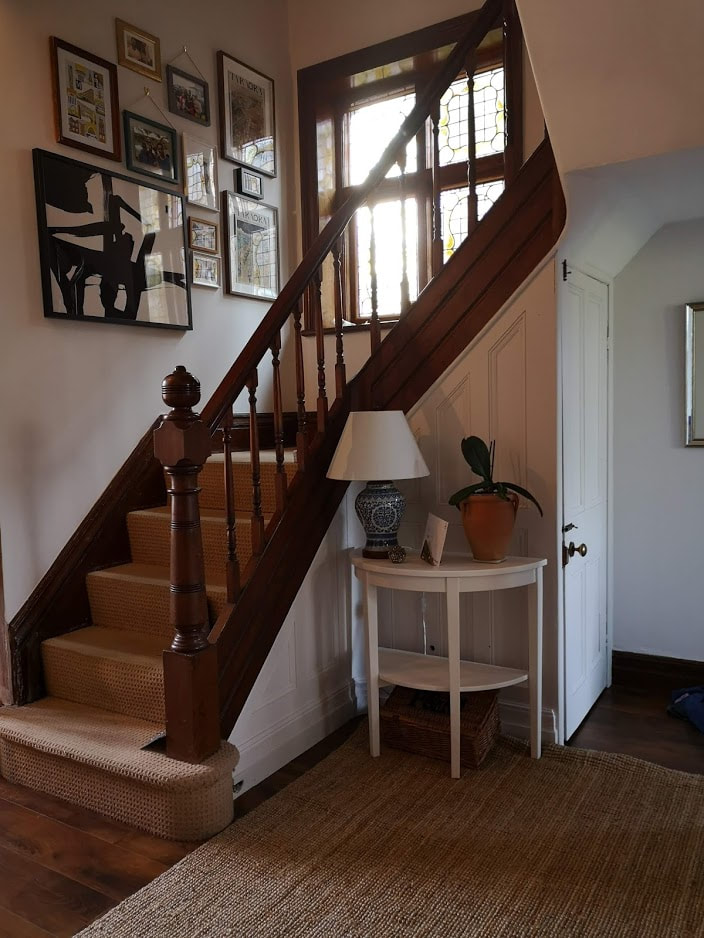
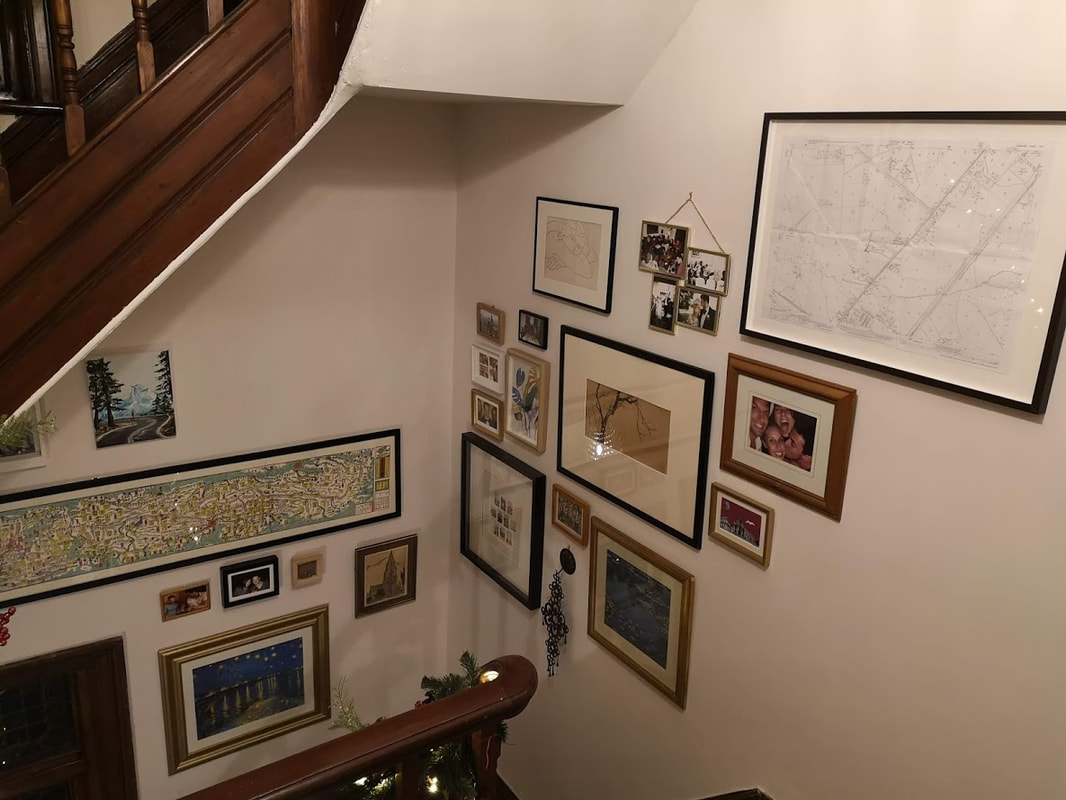
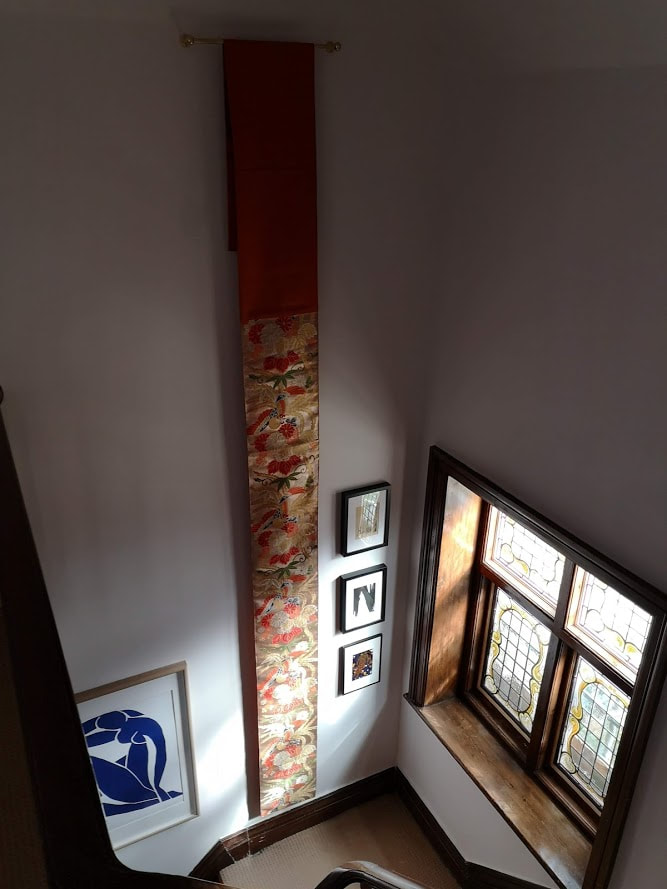
The evolution of the space that I created was very organic, we had en-massed a lot of prints and photos from holidays and trips abroad. I also bough some prints of my favourite artworks and had some bespoke framing made for oddly sized pieces. The lay out I took was to decide on a main piece for each wall, and then build around it. Selecting other images that work well next to and around it. I went for a very eclectic frame collection, from brand new to vintage. I also liked using different depths of frames to create volume to the wall so that not all the pictures were at the same depth. I also wanted to hang a beautiful vintage obi (the traditional belt worn around a kimono) which I bought in Kyoto, Japan. This is around 3.5 long so I had to find a specific site for it to be shown off in all its drama, which was to be on the top staircase. The thing about putting pictures all the way down just above the skirting boards is that on a standard wall it might not look well and you wont really every appreciate the art there, but on a staircase as you are constantly on a different level with each step you eye is on level with another piece of art or picture and therefore even at skirting board height, its visible from the landing just below, so why not put some art there? As a backdrop for this artwork I was torn between gorgeously dark and mysterious or light and airy. I decided to op for the latter as the hall is North East Facing and despite it being quite tall doesn't always seem so airy and bright, and with a very busy gallery wall I opted for a warm white, Great White by Farrow and Ball. It has a very delicate pink/lilac tint to it making it a warm white to use. Perfect for my hall/staircase. So with art all framed and scattered all over the house it came down to one day to collect all the pieces together and with a lot of nails and a hammer, the gallery wall was created. So a picture says a thousand words, so Ill just shut up now and let you have a look for yourself. Here are some shots over time as it has evolved, including some with a cheeky bit of Christmas garland!
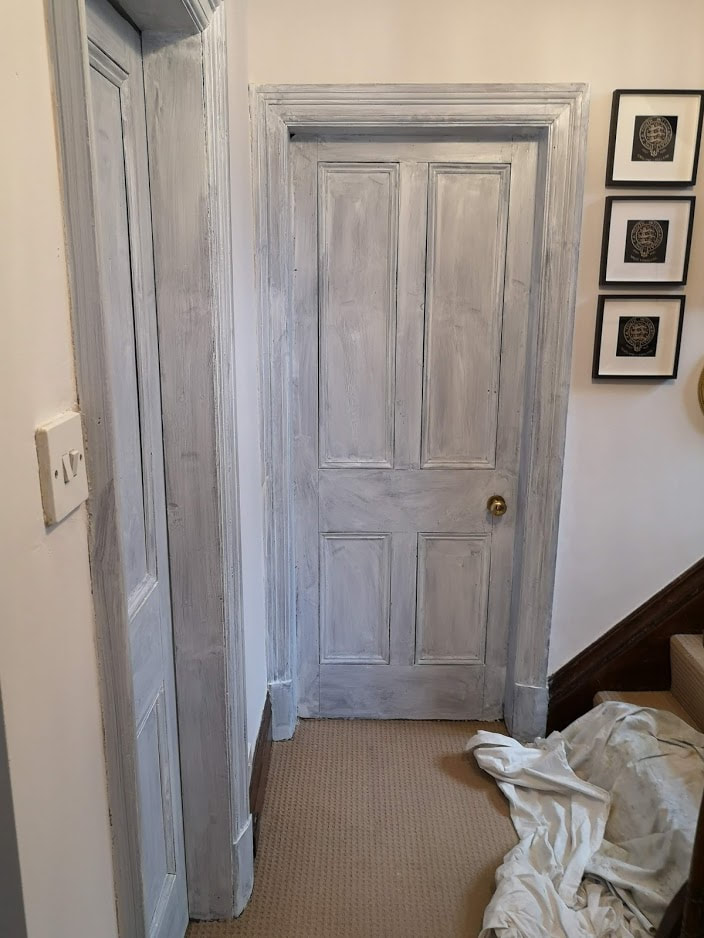
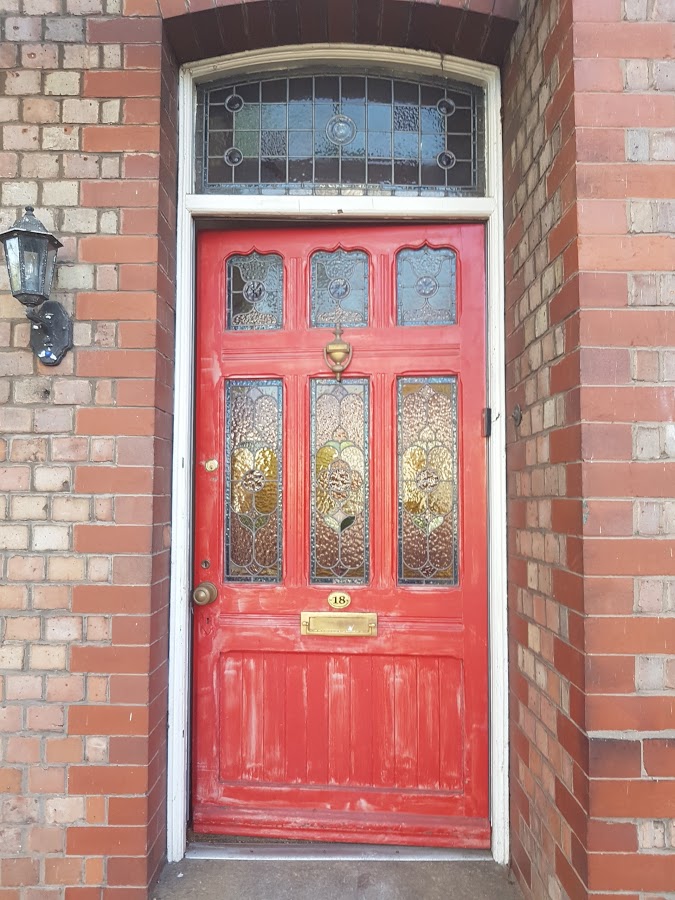
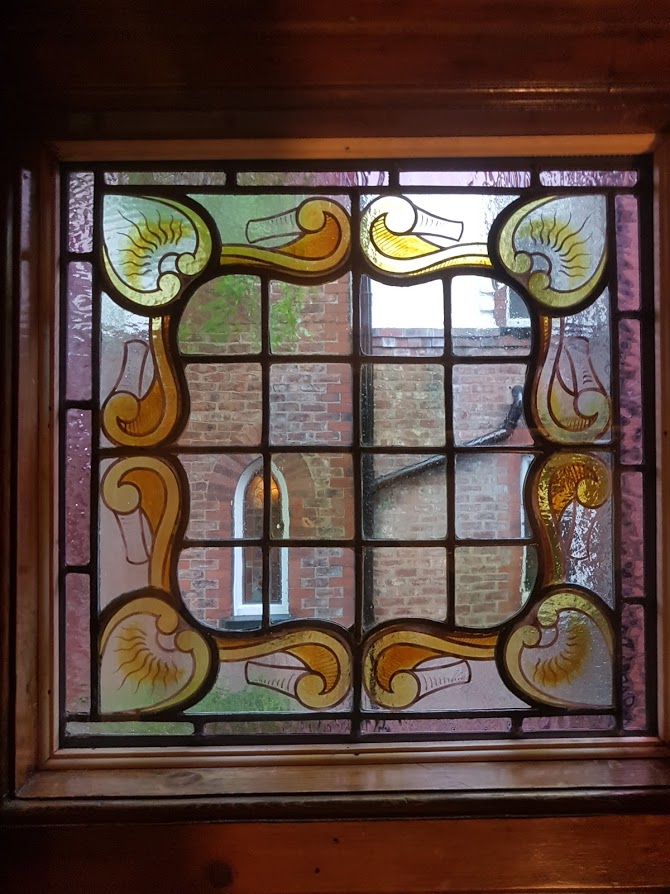
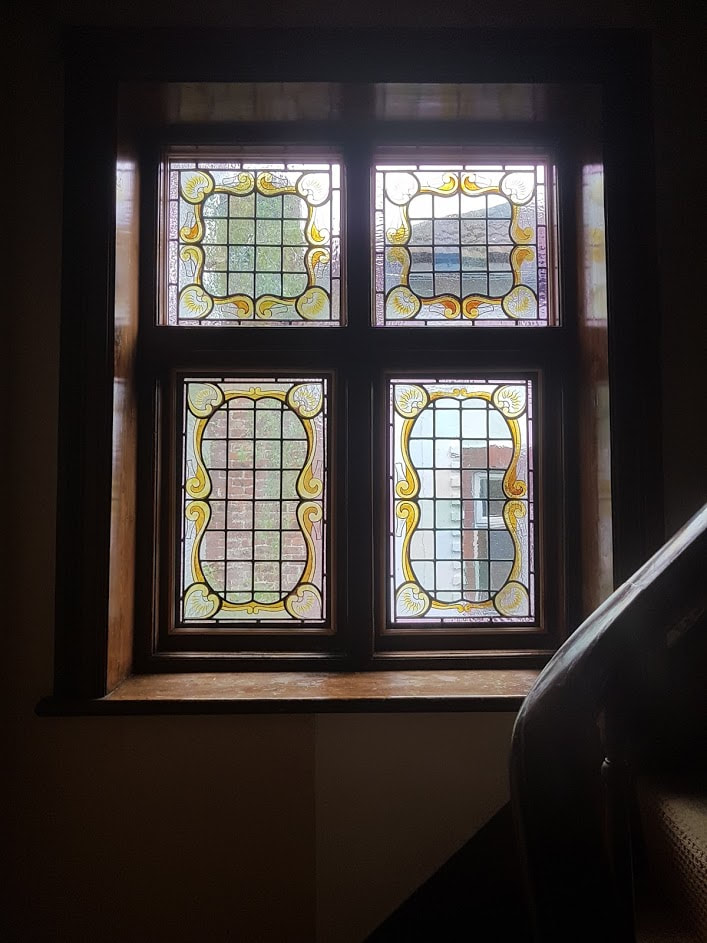
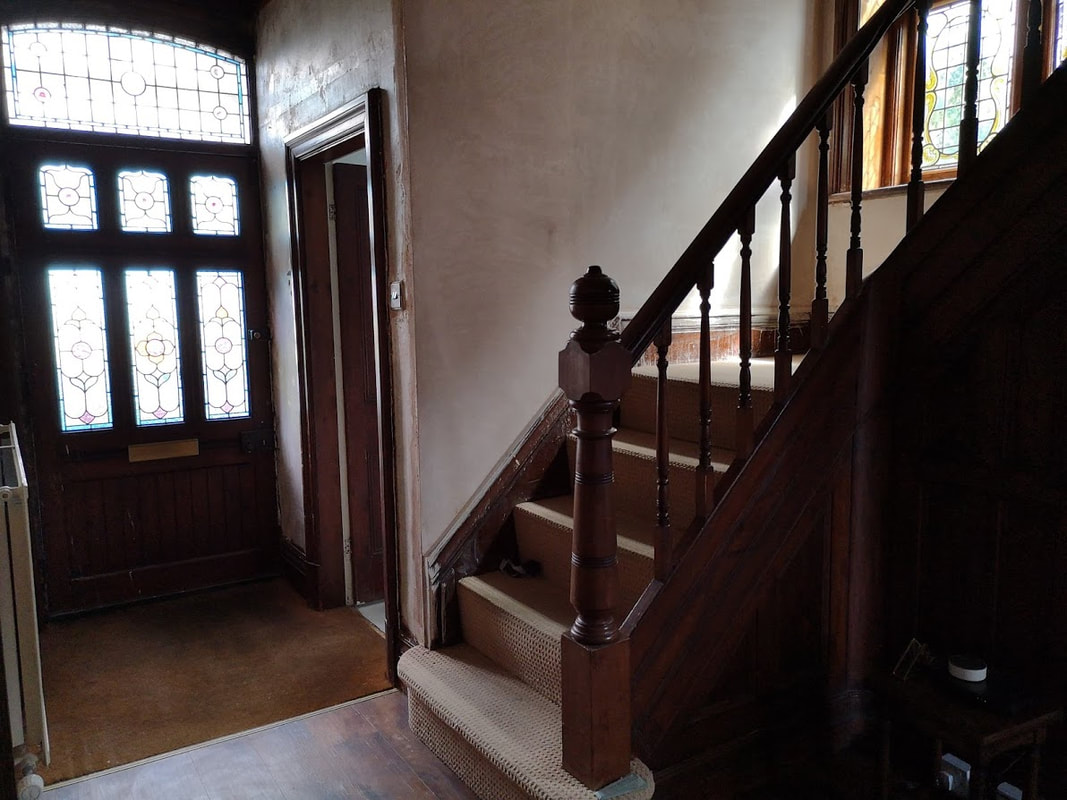
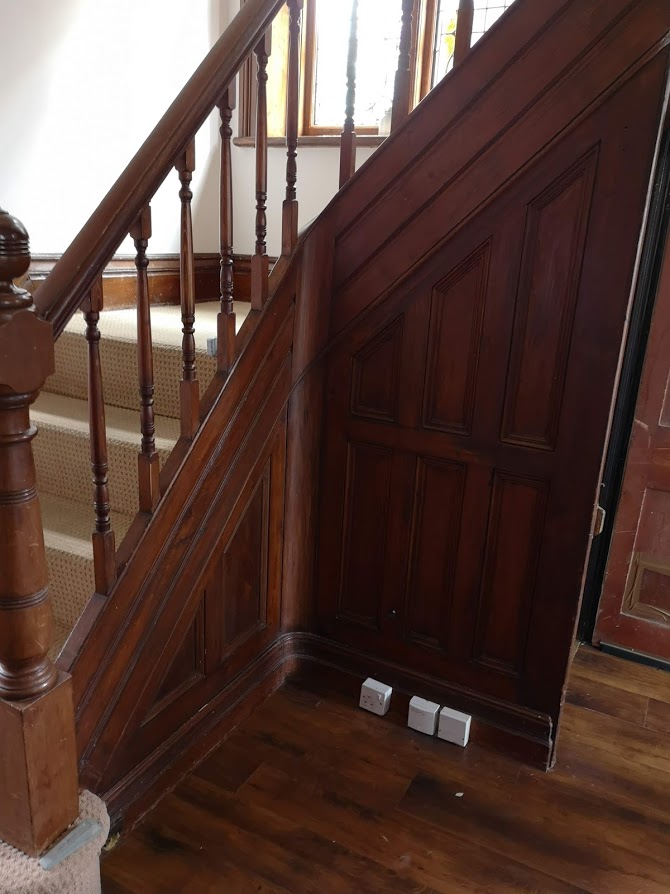
Hey everyone! I just wanted to put a quick post up about taking risks and a leap. In the latest update here AtNumer18 we have painted the panelling under the stairs to match the walls. I had a lot of fear about this and my partner and I have been discussing the virtues and vices of this decision ever since we bought the house in February 2017! Some people have asked why this decision was so hard, why such deliberation?! Well, we bought this 1890s house because its period features drew us to it. Everything from the front door, the swirling staircase the hand painted stained glass, the wood coving, the extra high skirting boards, the wood panelling under the stairs, the curved walls (a complete pain to re-plaster btw). These features are little stars of brilliance that makes this house unique and replacing such features would be prohibitively expensive.
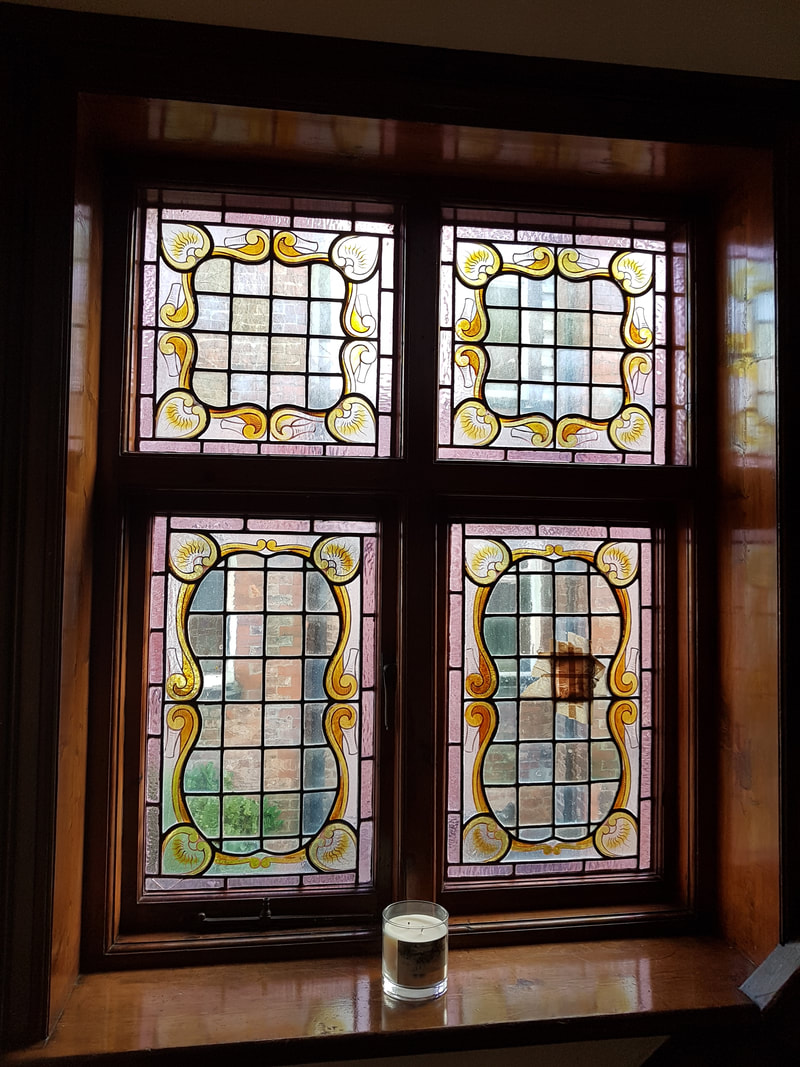
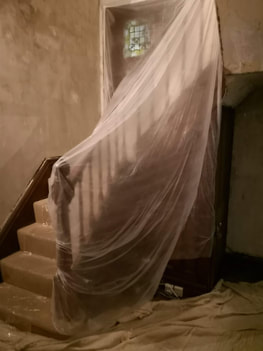
Therefore when renovating this house we wanted to do right by these features and the house by doing a very sensitive restoration/renovation balance. We wanted to update the draughty issues and improve the energy efficiency of the house in keeping with modern standards bu at the same time keep true to the original design of the house. This is why we have spent a small fortune on the windows by encapsulating the stained glass with soundproof and laminated glass. This was a relatively easy decision, as the current windows were so draughty, some windows didn't close properly, missing window panes taped over with DUCT TAPE! (See above) and some were so bowed they were in danger of completely falling out and shattering! The new windows are super silent, warmer, draught proof and super easy to clean too as all you need to do is wipe them down rather than each individual small pane of glass in turn. 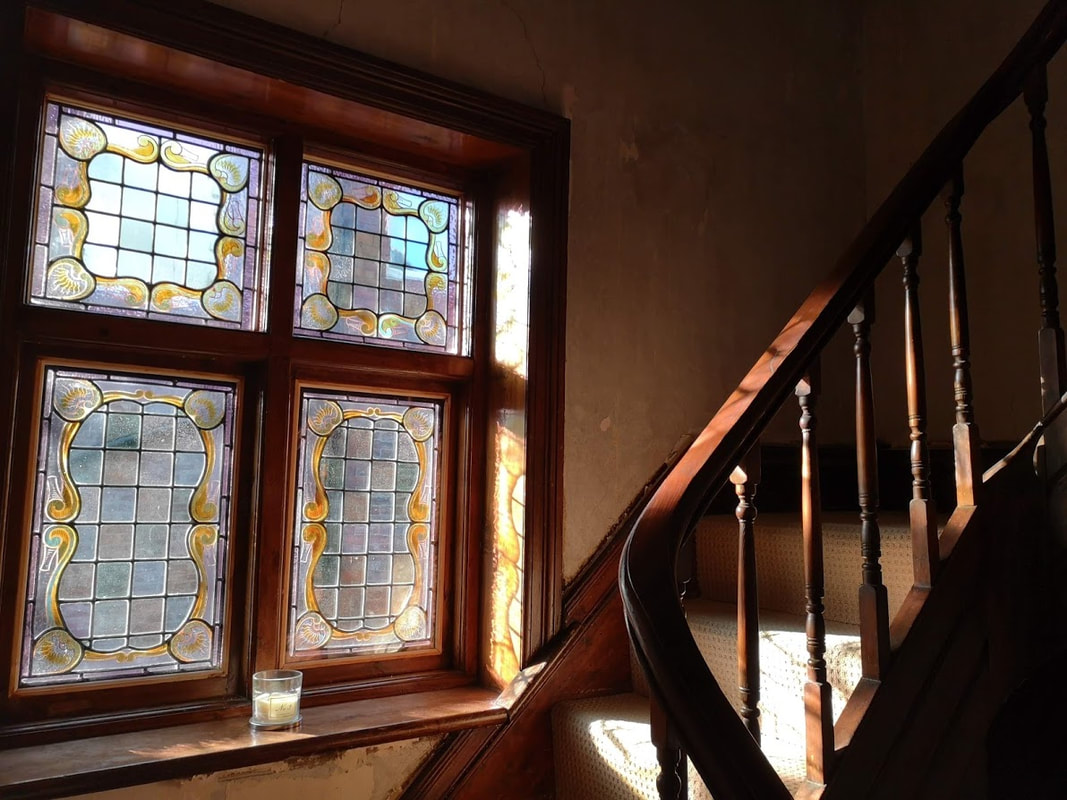
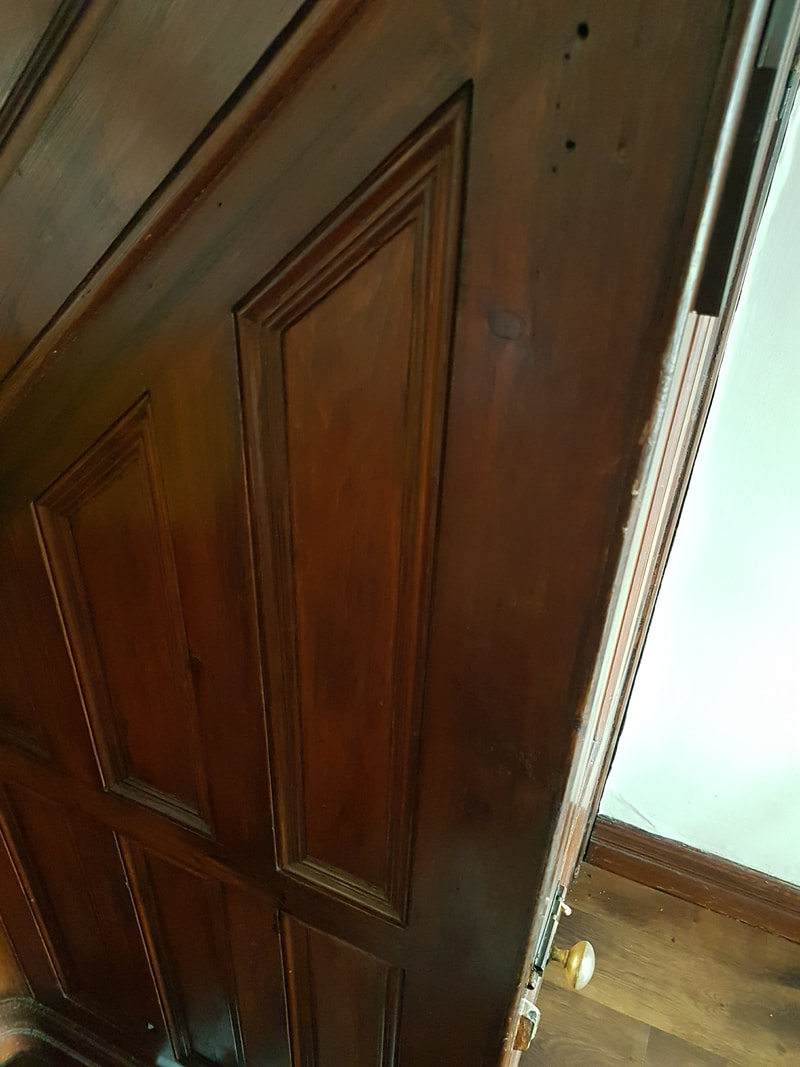
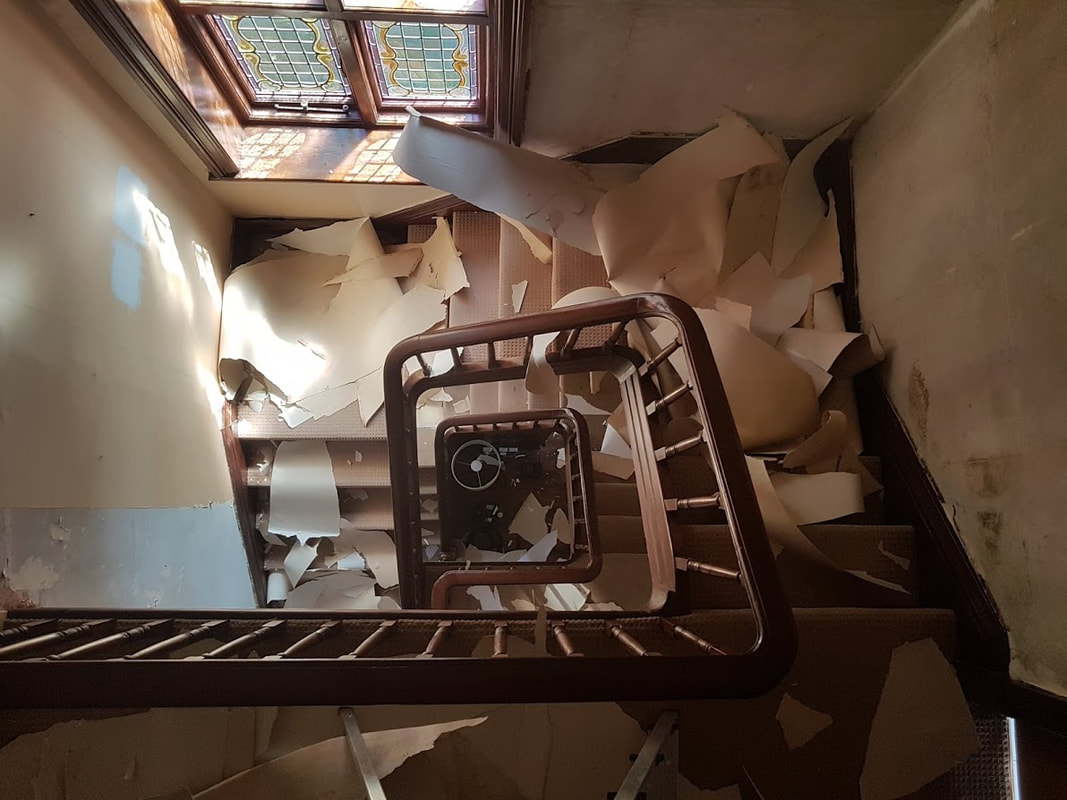
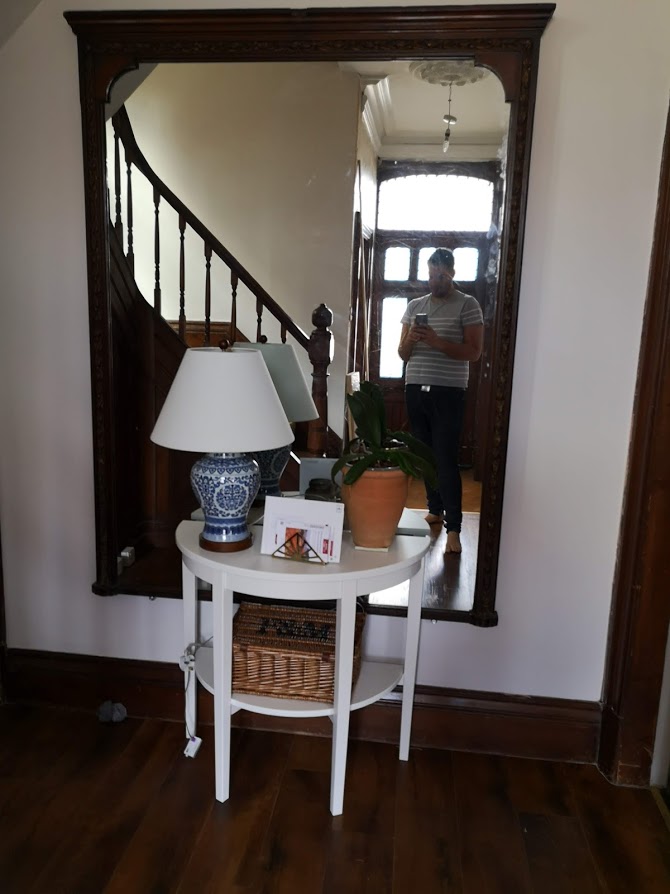
In relation to our latest tribulation, the decision to paint the panelling under the stairs! It has been stained a very dark mahogany colour and the flooring was chosen to match it, therefore the effect is that the whole hall, despite being relatively large, felt dark and the features were not appreciated. So a solution was needed. Unfortunately the original parquet floor was no longer present under the current floor and sadly we didn't have the budget to reinstate it currently. 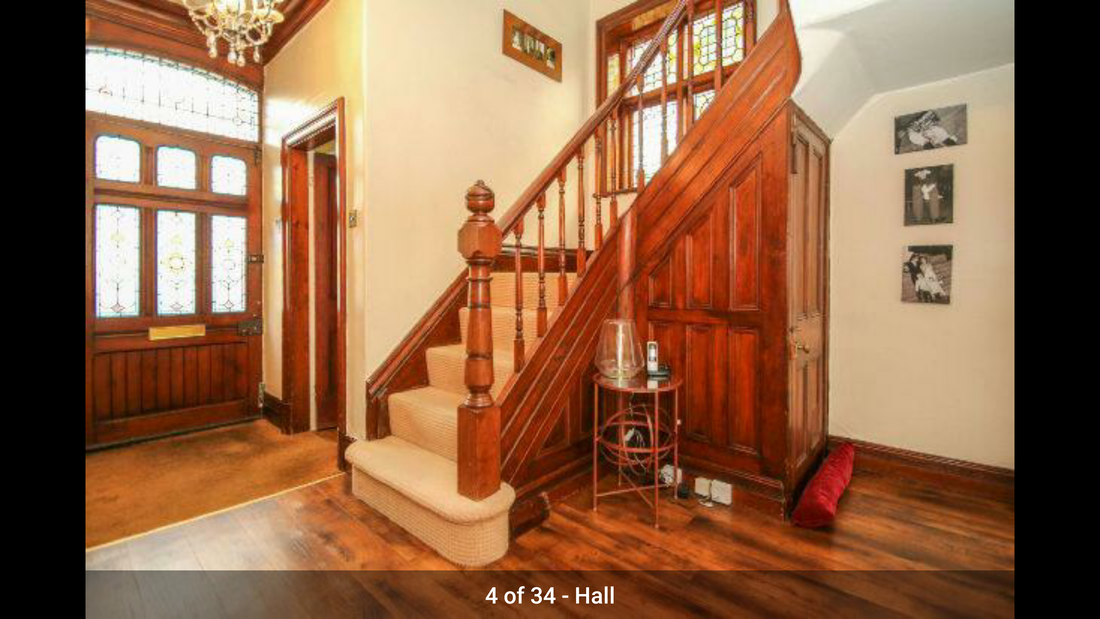 The Before pic from Rightmove I bought a massive antique mirror to hang in the hall to reflect as much light as possible, still too dark. The walls were, stripped from their cafe latte coloured wall paper, reskimmed and painted a bright warm white, a light jute rug was purchased, and still the space was not quite right.
So we took the plunge, brave face on and painted the panelling under the stairs the same colour as the wall. I was dreading it looking aweful, fearful that I would regret it and that I would spend hours the next day sanding it off and hunting to find the correct wood stain. Crying into my sand paper was the image that came to mind! Dramatic I know, but when you have spend so much time deliberating and trying to decide on balance what is the best plan for the house when maintaining its heritage and making it work for us, making a wrong decision can fill you with dread! Fear for the wasted expense, dreading the thought of time wasted, wishing you didn't waste so much brain power deliberating! And here it is, the hallway + gallery wall + painted panelling! All that is left is the stairs carpet and were done! 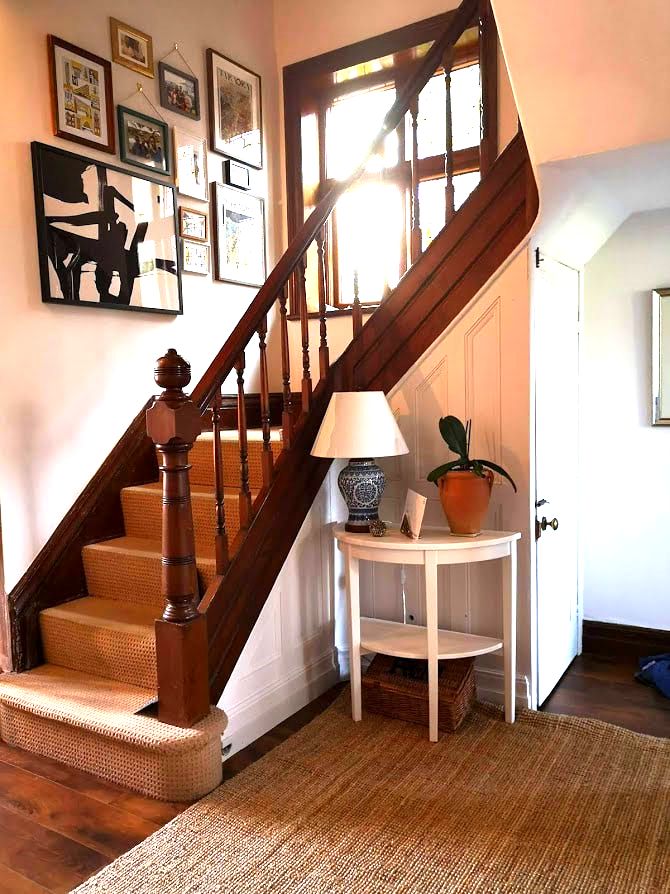 I've received some lovely compliments from you folk online and its really lovely that the internet can bring random people together over something like this! Hope you all like it, there is a series of stories on my Instagram under the Renovation and Hallway tour highlights if you want to have a more in-depth look.
I guess the moral of the story is: take the leap! Don't be afraid to experiment with your space. Nothing ventured, nothing gained! |
Categories
All
|


 RSS Feed

|
|
|
|

|

|
|

|
|
|
Award winning Interior Design & Styling - Cheshire, UK
Copyright © 2022