THE SPACEMAKER - INTERIORS BY PETER GRECH
  • Home
  • Portfolio
    • Heath House, Alsager, Cheshire
    • Casacoppa, Liverpool
    • Worldly Loft, Ancoats, Manchester
    • Space to grow, Wimbledon, London
    • Modern Victoriana - Altrincham, Cheshire
    • Georgian Townhouse, Cheshire
    • Modernist Mid-century, Malta
    • Playful apartment - Honour Oak, London
    • Classic in white - Sale, Manchester
    • Softened industrial bathroom
  • About
  • Services
  • Contact

How to make a no-sew Roman Blind

7/10/2019

0 Comments

 
Hello Everyone! When I was working on a clients study space we were discussing window treatment for her guest bedroom/study. The layout that we came up with had a floating dropleaf desk that went out of the way when she had guests staying allowing it to also function as a headboard! Smart right? Well that meant that you cannot have any curtains unless they are short ones (this is a bit of a NoNo in my honest opinion). So I proposed a roman blind that still adds pattern and a focal point to the room but would help filter out the light. She loved this option  and after hunting for the right fabric we landed on this gorgeous pattern from IKEA. Its called SKUGGBRÄCKA (try saying that while chewing fudge!). They had another stunning fabric with more of a structured pattern but considering the width of the blind this pattern worked better. Read all the way to the bottom for the things I would do differently in future. 
Monochrome black and white bold pattern fabric from ikea
Our fabric final for the blind
Now I won't lie, I cannot sew! And despite watching numerous you-tube videos and hunting down my curtain makers, the numbers just didn't add up and we wanted this installed in a matter of days. So I decided to try a no-sew approach. I must say this hasn't been endorsed by IKEA but we did end up using everything from there. So if you are a no-sew kind of guy/gal and you want to create something similar, this is what you need.

Materials:
  • Fabric - Make sure your fabric is an extra 10cm wider and longer than the full blind (this allows you 5cm on either side to fold over)
  • Blind - We used the clever magnetic blind from IKEA called RINGBLOMMA.
  • Iron on hemming strip - SY (you could use a glue gun if you prefer
  • Iron (obviously)

This took me around an hour from start to finish. So a super quick and easy project. (After you navigated the isles of IKEA)
Step 1:
Iron the fabric to make sure all the creases are out. Its easier to do this at the start. 

Step 2:
Lay the blind down on a large area and centre the fabric above it. If you have any pattern or repeats make sure that they are perpendicular to the blind (which is why I chose an abstract pattern as these repeats are concealed)

Step 3: 
I started at the bottom of the blind but you can do it the other way around if you so wish. Roll back the fabric, lay down the SY strip, and carfeully replace the fabric over it. Double check that the SY iron-on hemming strip is positioned properly and sandwiched between the fabric and the blind before moving onto the next. 

Step 4:
Iron on the strip. Make sure the temperature is hot enough to melt the glue but wont burn the fabric (Keep it moving) and check that the SY tape is melting and adhering. ​​

making a no sew roman blind using ikea products
TOP TIP: Working you way up or down the blind. Keep the remaining fabric rolled so it doesn't crease or get in the way.
how to get the fabric to stick to the blind using SY iron on hemming strip
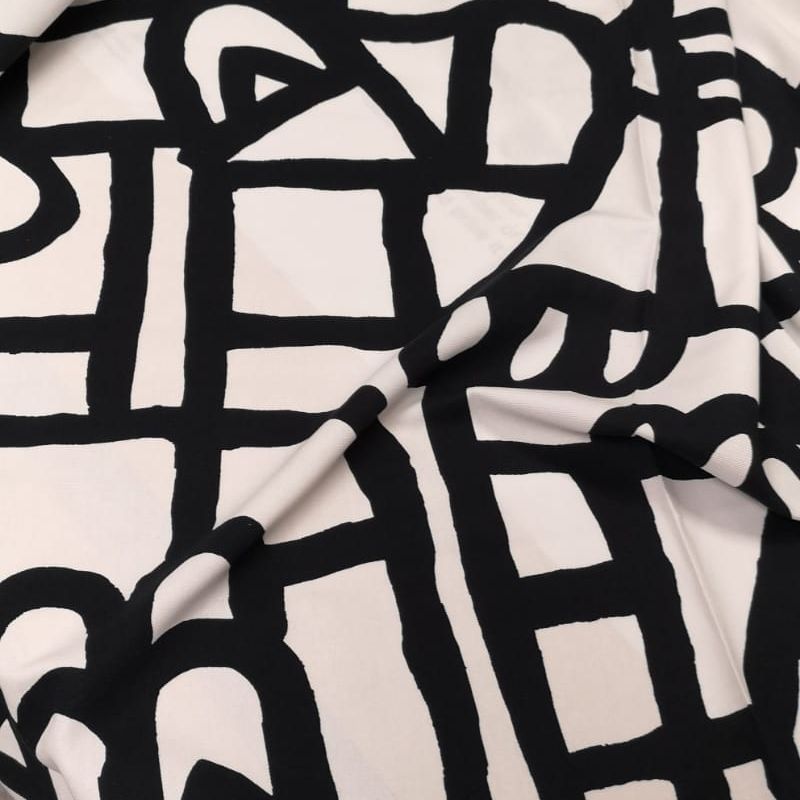
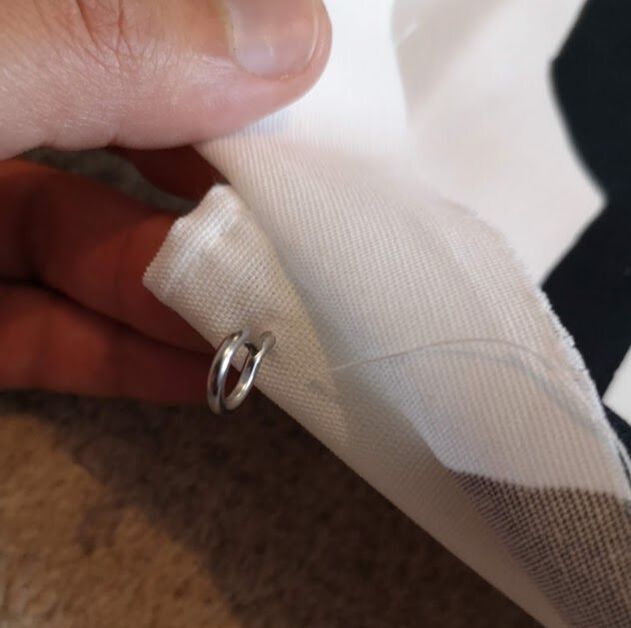
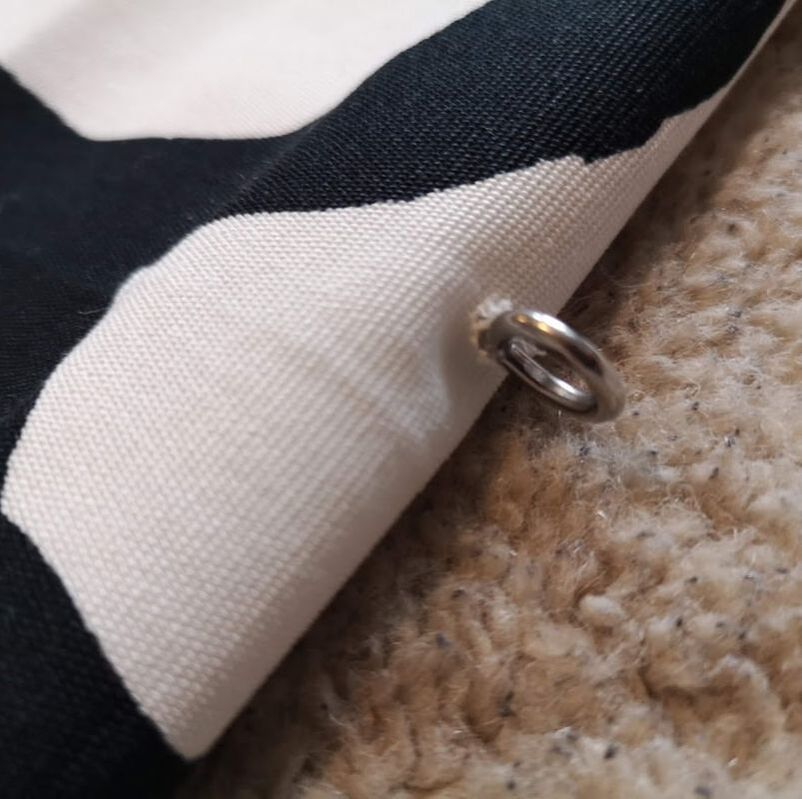
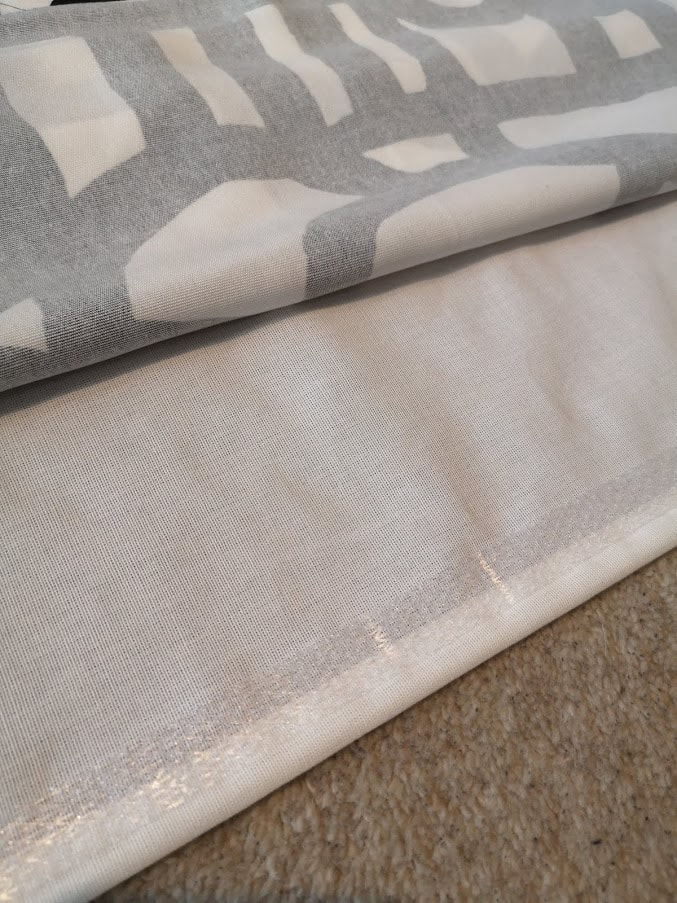
Align the SY tape to where you definitely want the fabric to be (as close to the edge in my case) and hold it in place while you sandwich it between the blind and the fabric. Proceed to iron it to activate the glue.
Step 5:
Work your way down the blind. I would suggest keeping the fabric (yet to be adhered), rolled up as it prevents it from getting creased or in your way. I applied a SY strip at every baton on the blind, This made sure that the fabric was definitely attached at these points. You could also consider using upholstery spray glue on the rest of the blind, but I was concerned regarding staining, and keeping the fabric supple so I avoided this. Make sure that your fabric is flat the way through before ironing on.

Step 6:
At the top of the blind there are little metal loops that the blind hangs from. To get the fabric over and around these, make little cuts in the fabric at the point where it would fold over and slide the head of the loop through. Make the cut as little as possible as you do not want the fabric to start fraying. 
top of the no sew roman bind hoop before
Keeping your fabric taught, make a small cut at the place where the base of the loop will be on the fabric.
top of the blind no sew roman blind hoop after
Pop the loop through. Remember to make a small hole as the base is narrower and you don't want the fabric to start fraying.
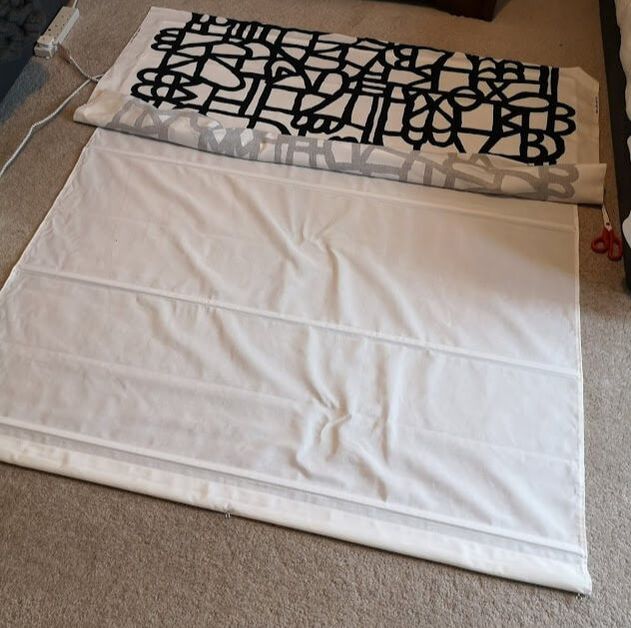
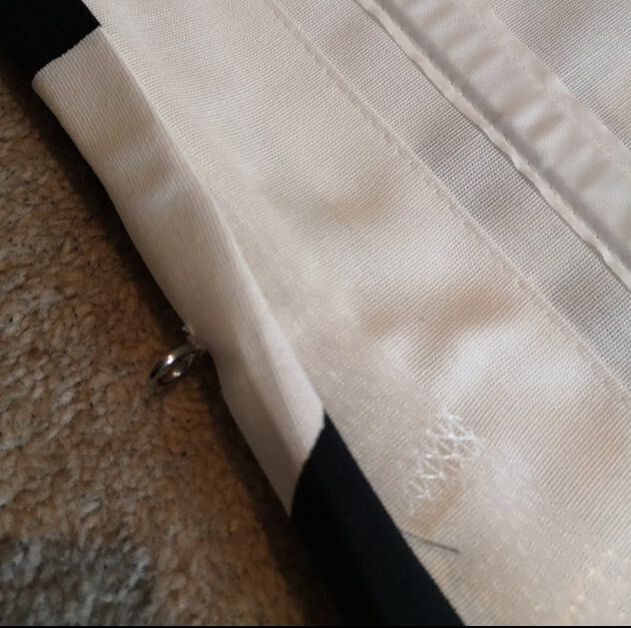
​Step 7:
Once you are done on the front of the blind, flip it over so the fabric is face down and the blind back is facing up. Now its time to hem the edges. I started with the sides as the fabric had a neat edge here and it was an easy win. Next move to the top and bottom. Fold the cut edge of the fabric so that the end was tucked in, then apply the SY strip and while holding the fabric in place iron it down. You will need to work on smaller sections at a time ensuring that the fabric is flat, neat and taught before ironing. 
how to make a neat hem on a no sew roman blind before
Folding the cut edge of fabric in and applying the SY strip you can work along to create a neat hem.
neat hem on a no-sew roman blind
The finished edge at the top should look neat like this.
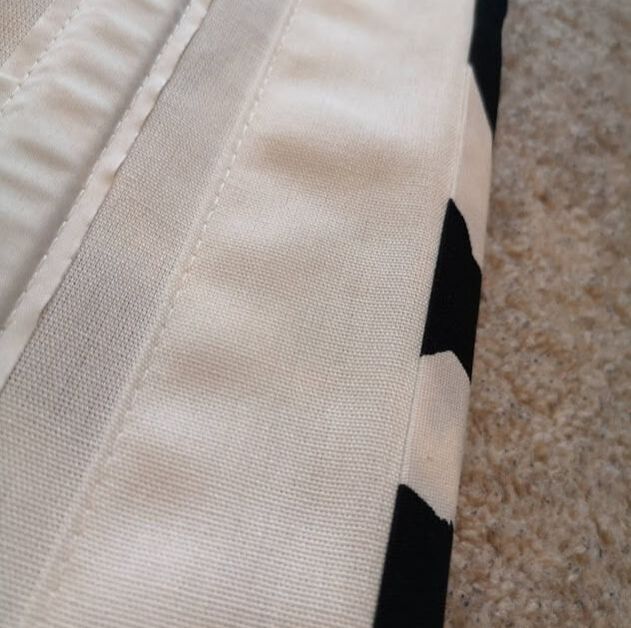
Step 8:
Finally at the corners, by folding in the corners of the fabric and using the same way we did at the top and bottom, make a neat hem. 
making neat corner details on a no sew roman blind
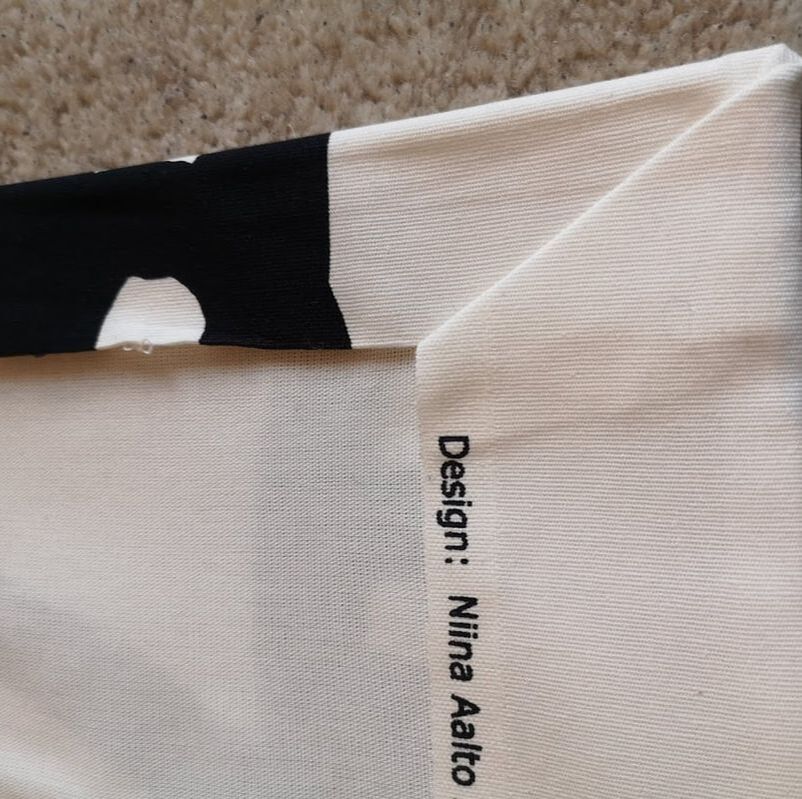
TOP TIP: Creating a neat back of the blind is super important as any flaws will be highlighted when light shines through the blind, revealing all!
Step 9:
Making sure that all the SY has set, you are ready to hang you blind!
no sew roman blind in a study in london
detail of the no sew roman blind
no sew roman blind in a study in london
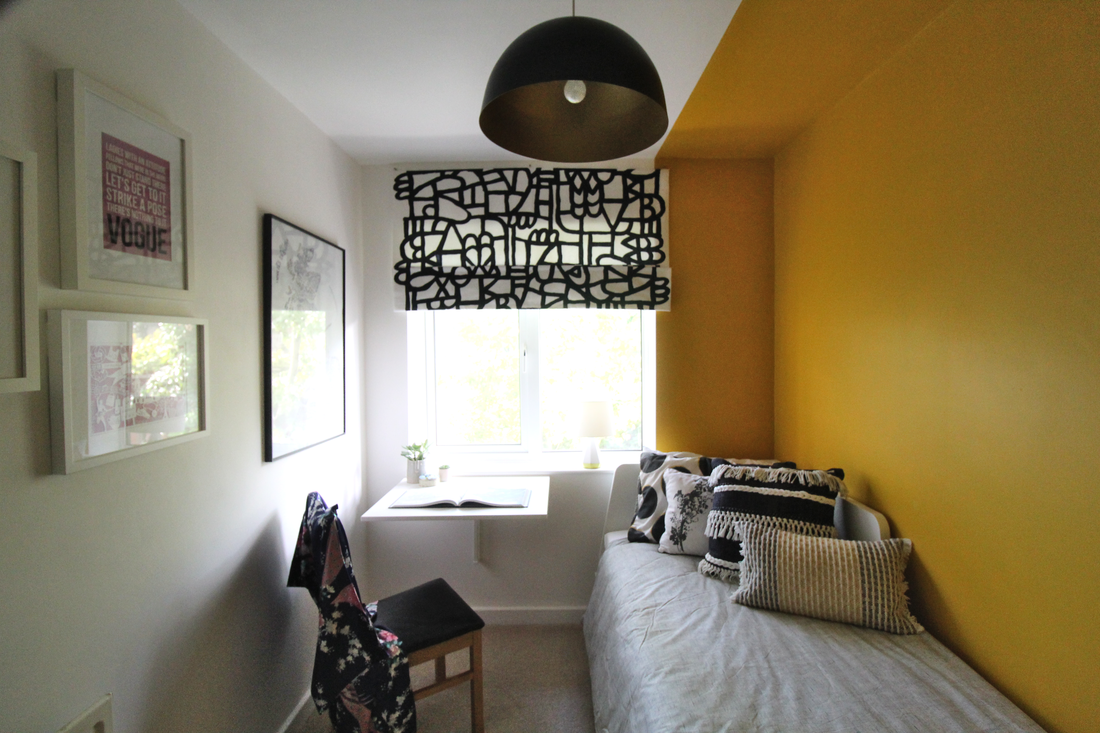
Some things I learned while on this no-sew roman blind project;
  • SY tape is basically dry glue so if you have a glue gun that could work just as well. 
  • Choose a light weight fabric as the magnets of the ringblomma that hold it up are not the strongest and any added weight in the fabric will compromise their strength. 
  • We used the widest blind as wanted it to sit in front of the window. The ringblomma blinds cannot be cut down to size if you wanted them to fit inside the window. 

So if you are also a no-sew kind of person, and want to create a beautiful, affordable blind for your space try this method out. Let me know how you get on by commenting below. Also if you want to keep up to date with any of my how-to's then subscribe to my newsletter at the bottom of the page and follow me on Instagram
0 Comments


Leave a Reply.

    Categories

    All
    Bathroom
    Bedroom
    Budget Friendly Interiors
    Colourful Interiors
    Colour Series
    Design
    Dining Room
    Hallway
    High Street Sourcing
    Home Office
    Interior Design Inspiration
    Interior Design Rules
    Interior Makeover
    Interiors Interview
    Interior Styling Tips
    Lighting
    Living Room
    Outdoor Living
    Seasonal Decor

    RSS Feed

Picture

    Join our mailing list

Subscribe

Home

Portfolio

About and press

Services

Contact

Articles

Styling Guides
Design Tips
Room Inspiration
Terms of use
Privacy
Picture
Picture
Peter Grech in Altrincham, Cheshire, UK on Houzz
Picture
Peter Grech in Altrincham, Cheshire, UK on Houzz
Award winning Interior Design  & Styling -  Cheshire, UK
Copyright © 2022
  • Home
  • Portfolio
    • Heath House, Alsager, Cheshire
    • Casacoppa, Liverpool
    • Worldly Loft, Ancoats, Manchester
    • Space to grow, Wimbledon, London
    • Modern Victoriana - Altrincham, Cheshire
    • Georgian Townhouse, Cheshire
    • Modernist Mid-century, Malta
    • Playful apartment - Honour Oak, London
    • Classic in white - Sale, Manchester
    • Softened industrial bathroom
  • About
  • Services
  • Contact