THE SPACEMAKER - INTERIORS BY PETER GRECH
  • Home
  • Portfolio
    • Space to grow, Wimbledon, London
    • Modern Victoriana - Altrincham, Cheshire
    • Georgian Townhouse, Cheshire
    • Modernist Mid-century, Malta
    • Playful apartment - Honour Oak, London
    • Classic in white - Sale, Manchester
    • Softened industrial bathroom
  • Services
  • Blog
  • About & Press
    • Interior Design Masters
    • The Cheshire Magazine feature
    • Real homes Editorial
    • Cheshire life Advertorial
  • Shop
  • Contact

Turning my hand at upholstery

25/9/2017

2 Comments

 
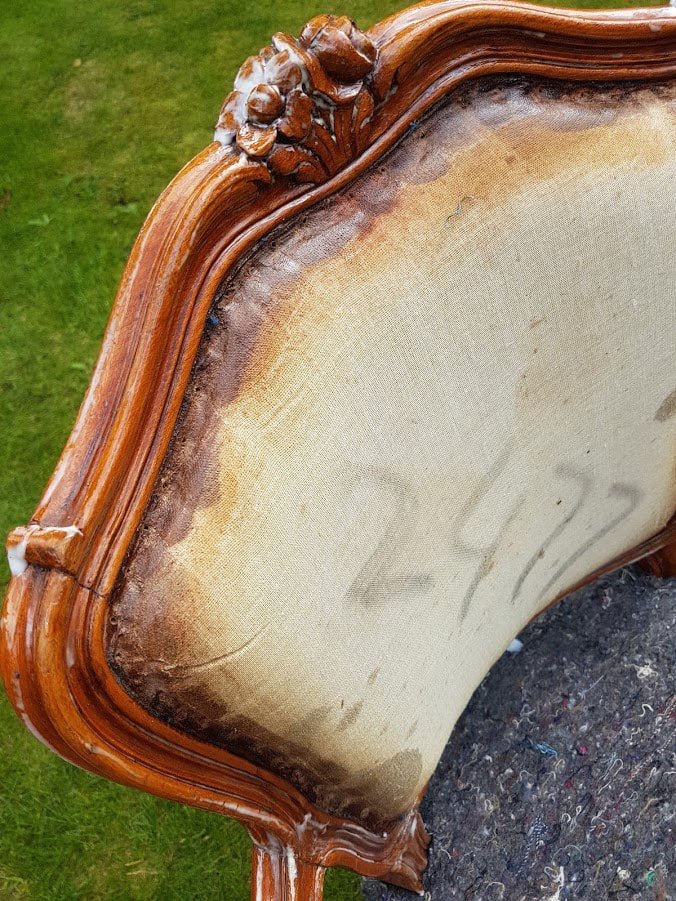
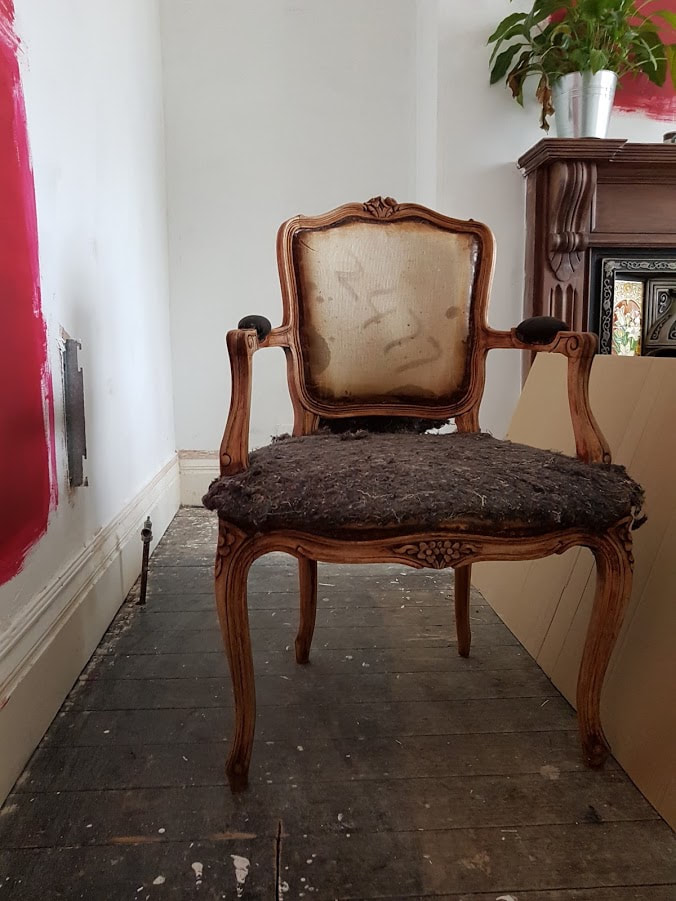
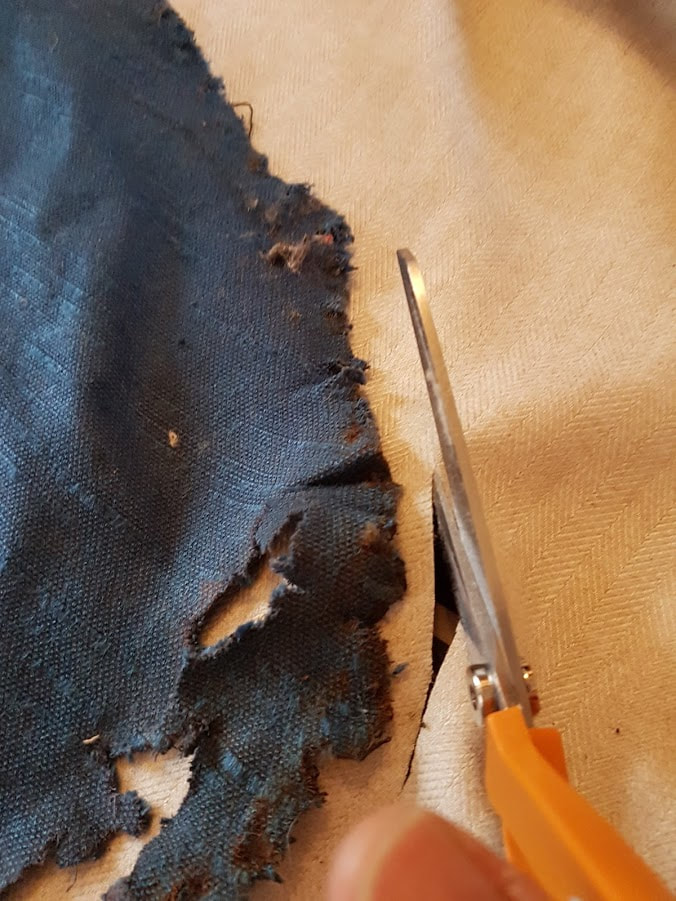
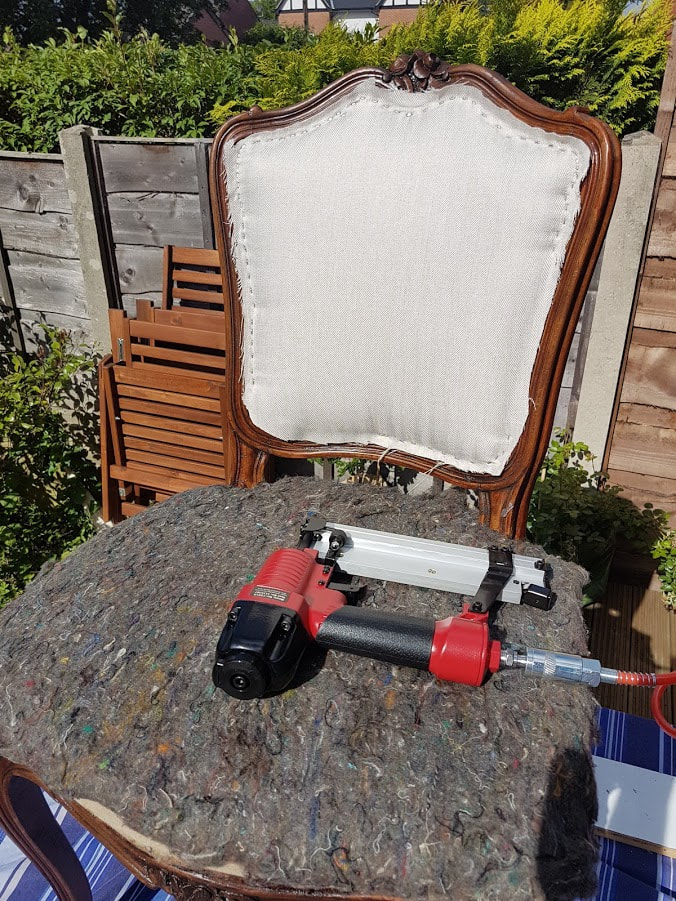
Hey folks.

Sorry for the delay between text posts but hopefully my instragram feed has kept you entertained! 

Today I will talk about my journey of of chair upholstery. Basically this started off from the point where I realised that the cost of the chairs that I wanted was way out of budget and that getting exactly the right colour and shape of chair is quite tricky. So therefore when we found a bargain of a 12-seater dining table the hunt was on for suitable chairs. This lead to me hunting around the antique markets (very frequently) until I found two sets of dining chairs. One set of 6 and one of 4. They weren't the right colour, fabric or finish ...but they were the right shape. Which got me thinking... I should be able to redo these chairs...why not? This is the when the process started.

So far I have completed 6 of the 10 chairs I need to do, and its been a steep learning curve. Luckily I found this video tutorial very very helpful and I followed it religiously. 
Picture
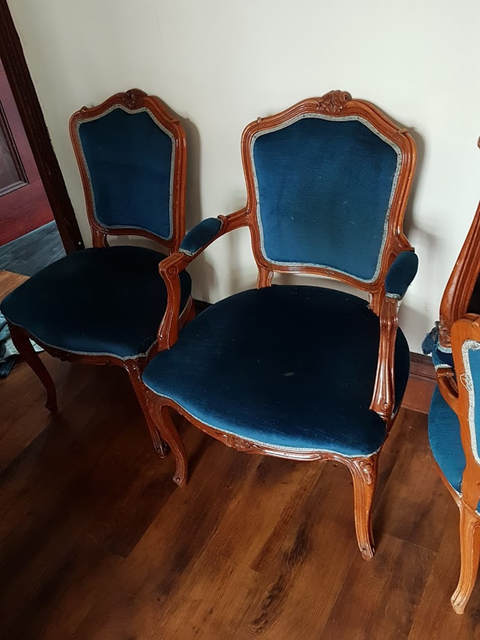
Chairs on Day 1 as purchased
The process of redoing the chairs involved multiple stages, as as each stage had to be repeated 6 times (for each of the chairs), it was quite a long process.

Step 1:
Removing the fabric from the chairs. The trim first needed to be pulled off to reveal the tacks that were holding the fabric to the chair, and these had to be removed one by one. I didn't have any fancy gizmos to help me out in this phase so multiple cups of tea, a screwdriver and some pliers helped ease the tacks off.
Picture
Tacks for days.
Step 2: 
Refinish the wood on the chairs. This was necessary in my case as the wood wasn't the right colour and had a high gloss finish which I wasn't too keen on. This was probably the longest and most difficult phase as the wood is obviously carved and getting varnish out of an intricate carving isn't easy. Some recommended dipping the chairs - but this would have meant removing all the wadding and stuffing of the chairs (which in some cases was original), and this can also weaken the structure of the chair. So after some research I opted for wirebrush and wood stripper. The chairs needed at least two goes at this to get the varnish off which came of in a thick treacle mess. After wiping down the chairs with a lot of soapy warm water, I finished buffing them down with some fine steel wool. 
The sticky white varnish stripper applied
After the varnish stripping is complete
Picture
Step 3:
Re-finishing the wood. The dining table that we have is a walnut table, so I went for a similar coloured stain. It is quite tricky to match the colours up especially as they are different woods being stained and also the chairs were very porous after the original varnish was stripped off. ​The finish I opted for was satin, as it is more subtle (nothing else is subtle about this room). 


Step 4:
Purchasing and cutting the fabric to be fitted. There are multiple learning points here. Firstly it is recommended that one uses a plain fabric or a non-directional fabric as it wouldn't matter as much if when the fabric is fitted its not all in the same direction. I thought I had obeyed this, but after buying the reems of fabric to cover all the chairs I realised that the fabric has mini-chevrons and therefore a direction. *SHOCK*

So apart from needing to keep this in mind when putting the fabric on the chairs, its also equally if not more important to keep this in mind when cutting the fabric. So making sure that all the lines were vertical and making sure that the cut out shape has a symmetry that folds along the lines. I only realised this after the first cut (error!) and had to make a second cut and therefore waste some. But definitely keep this in mind if you are thinking of using patterned fabric.
I used the old fabric as templates for the new fabric and gave myself approximately 1cm extra fabric all the way around (no need for more, and this will be annoying eventually). Keep in mind that different fabrics have different amounts of elasticity, so if the original fabric was very stretchy then you will probably need this margin, if not then you can be quite close to the original - and again if your fabric is very elastic (or has a lot of give) then you need to consider this when cutting it.
Picture
Step 5:
This was the fun part! Also quite loud! I purchased a pneumatic nail/staple gun and fitted the fabric to the chairs. One definitely needs one of these beasts for this kind of work as it would take a million times longer without the pneumatic gun. Also I wasn't sure that a normal nail gun would not be sufficient but after reading multiple blogs, they all said that the nails are a lot more securely put in and hold the fabric a lot better if pneumatically driven. Also its easier on your hands at the end of the day. Apply the staples in a North>South>East>West fashion to make sure that you have sufficient coverage for the whole surface you wish to cover. Try and get the staples as close to the outside of the lip of the chair which will make it a lot neater for when you apply your trim later.

As you can see there is quite a bit of fabric outside the staples. This all needed trimming away, so the closer you are to the original template the less of this you will have to do. 
Picture
Picture
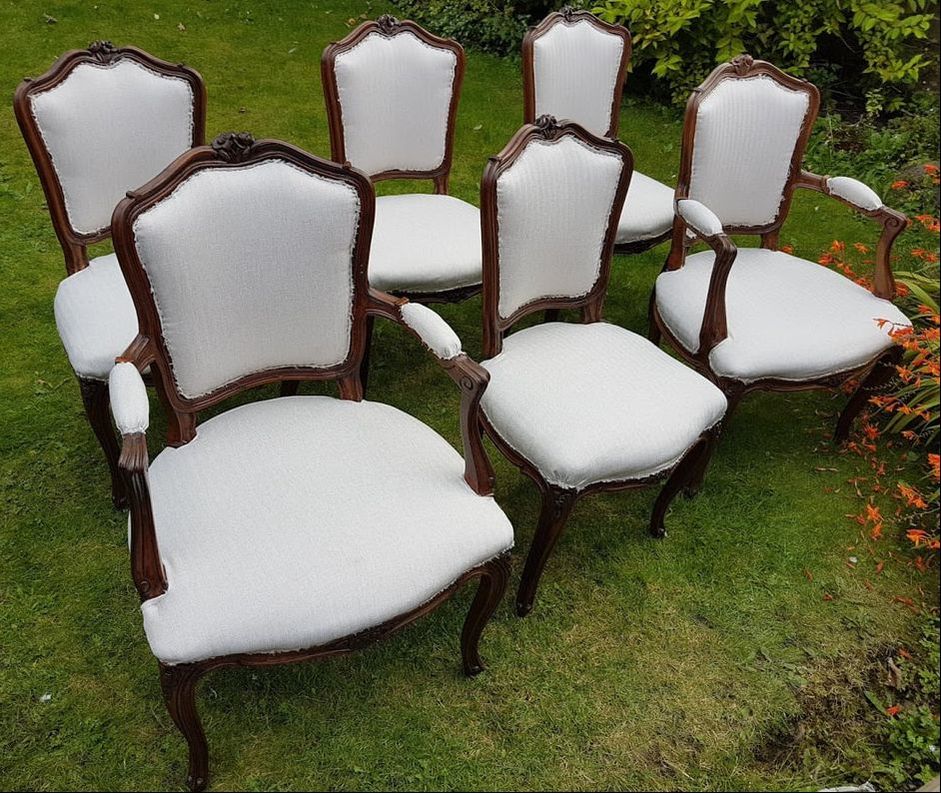
My army of 6 chairs
Step 6:
Buying and applying the trim. I went for a light taupe colour as couldn't get an exact colour match with the lighter colours and even though I was tempted with the cool electric blue trims, they wouldn't go well with this project. So glue-gun in hand (and loads of spare glue sticks)  I just went around over the staples and fabric edges with the trim and voila! All 6 chairs done. I think it took me around 10-11 hours per chair in the end. I might be faster on the next set of chairs... marginally. 
2 Comments
isabella mahoney
25/9/2017 06:08:43 pm

Well done Pete. Guess you're learning what satisfaction and pride you feel when you manage to do something yourself. The effect is contagious and will spur you to challenge yourself further. Looking forward to one day being able to visit. xxxxxx

Reply
Louisa Grech
25/9/2017 07:22:24 pm

Prosit my darling. You're turning your hand to many new challenges and learning in the process. Keep it up! You have good tastes, so all the more satisfying.🤗

Reply


Leave a Reply.

    Categories

    All
    Bathroom
    Bedroom
    Budget Friendly Interiors
    Colourful Interiors
    Colour Series
    Design
    Dining Room
    Hallway
    High Street Sourcing
    Home Office
    Interior Design Inspiration
    Interior Design Rules
    Interior Makeover
    Interiors Interview
    Interior Styling Tips
    Lighting
    Living Room
    Outdoor Living
    Seasonal Decor

    RSS Feed

Picture
Peter Grech in Altrincham, Cheshire, UK on Houzz

    Keep up to date with all that is happening by signing up to our newsletter. 

Subscribe
Home
Portfolio
Services
BLOG
About & Press
shop
Contact
Interior Design  & Styling -  Cheshire, UK
Copyright © 2020
  • Home
  • Portfolio
    • Space to grow, Wimbledon, London
    • Modern Victoriana - Altrincham, Cheshire
    • Georgian Townhouse, Cheshire
    • Modernist Mid-century, Malta
    • Playful apartment - Honour Oak, London
    • Classic in white - Sale, Manchester
    • Softened industrial bathroom
  • Services
  • Blog
  • About & Press
    • Interior Design Masters
    • The Cheshire Magazine feature
    • Real homes Editorial
    • Cheshire life Advertorial
  • Shop
  • Contact